
How to Grow Endive
Days to germination: 5 to 10 days
Days to harvest: 60 to 90 days
Light requirements: Full sun, or slight shade
Water requirements: Regular watering
Soil: Fertile with added lime
Container: Yes
Introduction
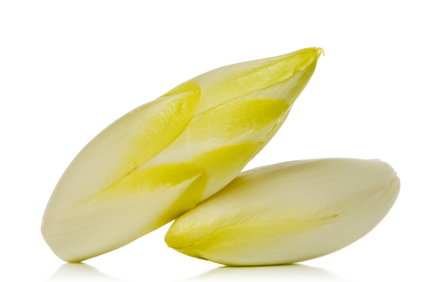
Endive can be a bit of a confusing vegetable because there is more than one kind. It’s a plant picked for its greens, usually used in salads. One variety of endive has very ruffled or even frilly leaves, but another kind has a much flatter and broad leaf. The flat type is sometimes called escarole, though it is the same plant as endive. Escarole has a milder flavor compared to the frillier (and slightly bitter) endive.
Neither is related to the Belgian endive. Belgian endive is closely related, but is not the same plant. You aren’t to get the tightly packed little heads of a Belgian endive if you grow true endive.
Endive is usually eaten raw, to add a bit of an edge to summer salads. The escarole variety is also good raw, and it is cooked more often then endive. You’ll get vitamins A and C with your endive, along with potassium, fiber and iron. It’s extremely low in calories as well.
Starting from Seed
You can start your endive crop early in the spring, or later in the season for a fall harvest. Either way, they love the cooler weather. Fall crops are usually seeded directly into the garden, but you can get an early start in the spring by using transplants.
Plan to start your endive 6 weeks before your last frost date. Your seeds should only be under a thin layer of soil, and keep them moist until they germinate.
Transplanting
Your little endive seedlings can go out into the garden around 2 weeks before you expect your final frost.
If you are going to harvest your endive as complete heads at maturity, put your seedlings 12 inches apart. You can plant them closer together if you are going either cut leaves off throughout the season or pull smaller plants before they take up too much room.
Loosen the soil, but you don’t need to dig down too deeply with endive. Add some compost or fertilizer before putting in the transplants. Mix in some lime as well to increase the calcium levels in the soil.
For direct planting, space your seeds out by 12 inches or just broadcast seed over the area and thin for young leaves as the plants begin to grow. Spring seeds should be in the ground the same time as seedlings would go out, 2 weeks before last frost. Seeds for a fall crop should be planted 2 months before your scheduled first frost date.
Growing Instructions
Endive’s roots are shallow, and grow close to the surface of the soil. So you should take care when weeding not to disturb the soil too deeply (like with a cultivator) or you can damage the plants. Either weed by hand, or smother out the weeds with mulch.
Water your plants regularly, making sure you keep the water near the roots rather than all over the leaves.
Containers
Endive is ideal for container growing, and can make a lovely addition to a flower garden as well. One plant will grow fine in a fairly small 6-inch pot. Add a little lime into the potting soil before you start your seeds, and keep the container well watered.
Pests and Diseases
A lack of calcium can cause tip burn, which is likely the problem when the ends of the leaves start to brown even though the plant is well watered. Adding lime at planting time will usually keep this from happening. Don’t try to dig in new lime once the plants are growing or you’ll tear up the roots. A liquid calcium fertilizer will work better to save your plants.
Too much moisture around your plants can cause a dust-like white fungus called powdery mildew. Water only at the soil, and don’t let your plants get too crowded. Thin out any extras so the air flow improves. Once your endive has it, just treat with fungicide.
Tiny aphids can harm your plants when they are in large numbers. They suck out the plants juices, so they don’t leave chewed marks behind. Take a close look or you might miss them. They can be rinsed off with water (first thing in the morning), or you can treat your plants with a natural insecticide.
Don’t spray your plants with either fungus or insect treatment if you intend to harvest the leaves within a few days.
Also be on the lookout for slugs and snails, though the strong flavor of the endive makes them less of a problem than with other leafy greens.
Harvest and Storage
You can start to trim leaves or even pull up entire young plants after about a month of growth. Or you can wait until the plants reach full-size and harvest them as mature heads of endive.
Towards the end of the season, around 2 weeks before it’s time to harvest the full endive heads, cover up the plants with a pile of straw. This will keep the sun off the leaves, and lightly “blanch” them. You’ll get milder tasting leaves if you do this, though it’s not necessary if you like the usual endive flavor. Curly endive is more likely to need this, rather than the flat escarole.
You can also tie the outer leaves up over the inner ones, just like you do when you blanch cauliflower. With either technique, only do it when the leaves are dry (not after watering or rain) or you can end up with moldy endive.
Don’t leave them much longer than their maturity date because the hot summer weather will make the plants send up flower shoots and go to seed (also known as bolting). The leaves will then be too bitter to use, even for endive. For your fall crop, none of this will be an issue since you are growing after the heat has passed.
And with a fall crop, leaves harvested after your first few light frosts will be much sweeter than your summer crop.
Like most leafy greens, endive does not store well and will only remain fresh in the refrigerator for 3 to 5 days.
One Response to “How to Grow Endive”
Leave a Response
Blog Categories
- Critters & Creatures (20)
- Gardening (222)
- Edible Gardening (60)
- Plant Profiles (32)
- Planting Ideas (40)
- Troubleshooting (48)
- Gardening Coupons & Deals (13)
- Greenhouse Gardening (4)
- Landscape Design (22)
- Pictures (8)
- Reviews (2)
- Videos (5)
Recent Forum Posts 
| Thread Title | Replies |
| hi | 0 |
| savetiktok | 1 |
| Hello all | 0 |
| Онлай... | 0 |
| Hello all | 0 |
| Introduction | 1 |
| Thuja Green Giant | 0 |
| write my philosophy paper for me | 0 |
| I am looking for some advice. | 4 |
| Fruit that's really nice, but not c... | 0 |
|
Members: 3189 | Posts: 3761 Come Join the Discussion Today! |
|
Site Categories
Archives
- December 2020
- December 2019
- November 2019
- January 2019
- April 2018
- February 2018
- December 2017
- November 2017
- May 2017
- April 2017
- September 2016
- July 2016
- June 2016
- April 2016
- March 2016
- February 2016
- December 2015
- November 2015
- September 2015
- June 2015
- May 2015
- April 2015
- January 2015
- December 2014
- November 2014
- October 2014
- September 2014
- July 2014
- June 2014
- March 2014
- February 2014
- December 2013
- November 2013
- September 2013
- July 2013
- June 2013
- May 2013
- April 2013
- January 2013
- December 2012
- November 2012
- October 2012
- August 2012
- July 2012
- June 2012
- April 2012
- March 2012
- February 2012
- October 2011
- September 2011
- August 2011
- July 2011
- June 2011
- May 2011
- April 2011
- January 2011
- December 2010
- October 2010
- September 2010
- August 2010
- July 2010
- June 2010
- May 2010
- April 2010
- March 2010
- February 2010
- January 2010
- December 2009
- October 2009
- July 2009
- June 2009
- May 2009
- April 2009
- March 2009
- January 2009
- December 2008
- November 2008
- October 2008
- September 2008
- August 2008
- July 2008
- June 2008
- May 2008
- April 2008
- February 2008
- January 2008
- November 2007
- October 2007
- September 2007
- August 2007
- July 2007
- June 2007
- May 2007
- April 2007
- March 2007
- February 2007
- November 2006
- October 2006
- September 2006
- August 2006
- July 2006
- June 2006
- May 2006
- April 2006
- March 2006
- February 2006
- January 2006
- December 2005
- November 2005
April 22nd, 2015 at 8:18 pm
i like your explanation its verywel can you tel me where to by the seeds for the endives thank you regards jose