
Extend the Harvest: How to Make Jam
January 27th, 2010This isn’t strictly a gardening post, strictly, but as I look outside and see the cold barren wasteland of Hoth I can’t really write much about gardening, can I?
However, extending your harvest is something that is interesting and useful for all people who grow edible plants, which is a whole lot of gardeners, so I’ve decided this is on topic enough for me to post about.
I love making jam, I can make really cool flavors that you cannot buy in a store. I can give the really cool flavors away and feel that they’re special gifts because they’re unique and I made them myself. I also like the concept of self sufficiency and so I can, if I choose, not give a dime to smuckers and still have all the toast and PB&J’s I want, all year round.
Plus, one can only eat so much fruit when it is in season. You give it away then, or it goes bad. And sometimes fruit that isn’t good enough to eat out of hand, can still be canned. Such as odd looking pears & apples.
How to Can
Call this your 2 minute primer. It is actually really easy to do. You’ll need mason jars & lids, which you can buy at the grocery store. You’ll need pectin (which is what helps it set), which you can also buy at the grocery store. The pectin will come with instructions as well. And you need a couple big pots and a small canning toolkit. I like this set here because the ladle holds the perfect amount to fill a typical jar up to the appropriate level while still leaving head room.
Anyways, back to your primer. First, you must sterilize everything. Put a clean towel out on your counter and boil some water, put all the tools in the water, all the metal lid rings too, but not the actual lids. With the lids while the water is coming up to boiling, but still just barely simmering, dip them in briefly, then remove and put on the towel, no touching with your hands. Give it a few minutes at a roiling boil, remove everything and set on the counter (wash your hands too, you did do that right?). Now put the jars in the water, and leave them there (keeps them warm).
In another big pot make your jam or jelly or whatever as per your recipe, then using the ladle and funnel ladle into a hot jar you just removed from the boiling water, leaving one quarter inch of space left at the top. Using the magnet tool put a lid on the jar, then secure a metal ring on, but do not tighten it, think secure, not tight. Do this for all your jars, then put the jars back into the boiling water with at least 1 inch of water above them, you may need to boil them in two batches, and boil for 10 minutes (at sea level, you mountain people will have to go longer).
After the required time remove the jars and place them on cooling racks, they’re now done. You should hear clicks and pops as the vacuum seals start working. After a few minutes of cooling test each lid by pressing down on the center of it, if you can move the little lid popper thing, it isn’t sealed and you can try again, or just put that jar in the fridge and eat it first.
The other jars should be good for a year to forever, use a sharpie to write a date on the lid, and store them in the pantry, but always err on the side of caution. If you pull a jar out of the pantry and the seal is broken (the popper pops when pressed) discard it. All jars should be hard to open the first time, if they’re easy, it didn’t work. If you open a jar up and it smells wrong, discard it. If it is off color, discard it. If mold is growing, discard it. Better be safe than sorry, you can always make more jam.
Now, my three favorite recipes. If you make any of these, come back and post a comment letting us know how it worked out.
Banana Rasberry Rum Jam
This stuff tastes so good I don’t know why it isn’t sold in stores. There is just a hint of banana flavor in the jam and it makes a mean PB&J, probably because, apparently, bananas go well with peanut butter (see Elvis). It is also good on toast and I’ve used it to glaze salmon. The alcohol in the rum boils off during cooking, it is just used for flavor.
3.5 pounds raspberries fresh or frozen (since raspberries go bad so quickly I usually freeze the ones I harvest from my garden that I don’t eat that same day, and then when I have enough frozen, make a jam)
3 very very ripe bananas
1 cup of dark rum
1 cup of cranberry juice
1 package of “Ball’s No Sugar Needed” pectin
3 cups of sugar (we’ll use some anyways, but normally we’d need 6 with regular pectin)
1/4 cup honey
pinch of salt
Add it all to a big pot and cook until it is liquid and boiling, stirring frequently, very frequently. Skim off any foam on top (it is perfectly edible, just air bubbles). Then run it through a food mill in batches to remove the seeds. Put it back in your pot, back up to boiling, and then ladle into the jars and process as mentioned above.
Makes about 9 jars. All jars in this article are half-pint size.
Caramel Pear Butter
I love my pear tree, but because I don’t spray it or otherwise baby it during the year I get a lot of messed up fruit, maybe it fell off, maybe an insect ate some of it. Maybe it is just underripe. Whatever the problem, pear butter is the solution. Cut off the bad parts, keep the good parts, and make pear butter out of them. You could also do this with apples, all the rejects from your tree. You can use this on toast etc, but also, try glazing some pork with it.
1/4 cup apple juice (cold pressed natural please, this replaces the pectin)
6 tablespoons fresh lemon juice
7 pounds ripe pear flesh, peeled, seeded, cored
3 cups packed light brown sugar
1 teaspoon fresh grated nutmeg (really, buy whole nutmeg and grate it fresh, tastes so much better and keeps far far longer, trust me)
3/4 teaspoon coarse kosher salt (other salt is okay, I guess)
Add the fruit, apple juice, and lemon juice in the pot and cook, stirring often, until the mixture is liquid and boiling. You may want to add the lemon juice first or as you go to help prevent the pears from browning. Boil for about 15 minutes, cover, and then simmer another 20 minutes. Blend with an immersion stick blender (or blend it in a real blender in batches, immersion blenders are so much easier, and good for soups too). Now add the sugar, nutmeg, and salt, boil until the sugar dissolves, simmer uncovered until reduced to 8 cups, stirring frequently.
Then ladle it into the jars as above and process as above. Note, no pectin is added, but apple juice has some in it, still, if you want it less sauce like and more jam like, add a little bit OR add some unripe apple flesh to the pot at the beginning (also high in pectin).
Makes about 15 jars.
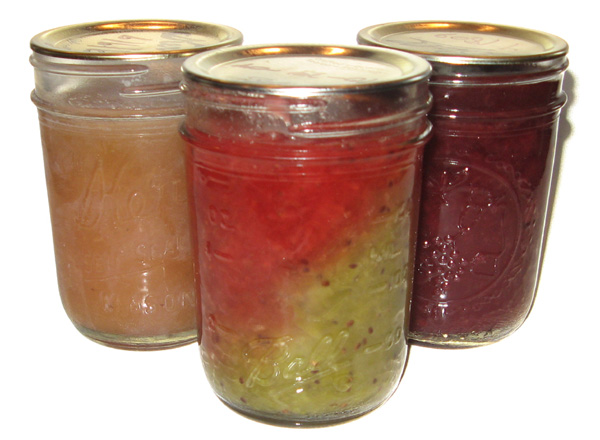
Strawberry Kiwi Christmas Jam
I make this jam with the little fuzzless hardy kiwi I grow in my garden. I call it Christmas jam because you can make it two-tone red and green if you make each fruit separately and then pour in layers. You can also easily mix the two together. So if you want to do it separately, divide everything in half (half of the sugar to each pot etc) or just mix it all. You can use regular store bought brown kiwi if you don’t grow or can’t find the smaller green hardy kiwi, but peel them.
1.5 pounds hardy kiwi, stems removed.
1.5 pounds strawberries, cleaned and green bits cut off.
4 cups of sugar
1 packet of “Ball’s No Sugar Needed Pectin”
3 tablespoons lemon juice.
Cook fruit and juice together until liquid and boiling, mash with potato masher, cook a few minutes more, add sugar and pectin, stir frequently until everything has combined. Check taste with spoon, smile, it is good.
Prepare your jars for canning as above, ladle and process as above. Makes about 10 jars.

5 Responses to “Extend the Harvest: How to Make Jam”
Leave a Response
Blog Categories
- Critters & Creatures (20)
- Gardening (222)
- Edible Gardening (60)
- Plant Profiles (32)
- Planting Ideas (40)
- Troubleshooting (48)
- Gardening Coupons & Deals (13)
- Greenhouse Gardening (4)
- Landscape Design (22)
- Pictures (8)
- Reviews (2)
- Videos (5)
Recent Forum Posts 
| Thread Title | Replies |
| hi | 0 |
| savetiktok | 1 |
| Hello all | 0 |
| Онлай... | 0 |
| Hello all | 0 |
| Introduction | 1 |
| Thuja Green Giant | 0 |
| write my philosophy paper for me | 0 |
| I am looking for some advice. | 4 |
| Fruit that's really nice, but not c... | 0 |
|
Members: 3189 | Posts: 3761 Come Join the Discussion Today! |
|
Site Categories
Archives
- December 2020
- December 2019
- November 2019
- January 2019
- April 2018
- February 2018
- December 2017
- November 2017
- May 2017
- April 2017
- September 2016
- July 2016
- June 2016
- April 2016
- March 2016
- February 2016
- December 2015
- November 2015
- September 2015
- June 2015
- May 2015
- April 2015
- January 2015
- December 2014
- November 2014
- October 2014
- September 2014
- July 2014
- June 2014
- March 2014
- February 2014
- December 2013
- November 2013
- September 2013
- July 2013
- June 2013
- May 2013
- April 2013
- January 2013
- December 2012
- November 2012
- October 2012
- August 2012
- July 2012
- June 2012
- April 2012
- March 2012
- February 2012
- October 2011
- September 2011
- August 2011
- July 2011
- June 2011
- May 2011
- April 2011
- January 2011
- December 2010
- October 2010
- September 2010
- August 2010
- July 2010
- June 2010
- May 2010
- April 2010
- March 2010
- February 2010
- January 2010
- December 2009
- October 2009
- July 2009
- June 2009
- May 2009
- April 2009
- March 2009
- January 2009
- December 2008
- November 2008
- October 2008
- September 2008
- August 2008
- July 2008
- June 2008
- May 2008
- April 2008
- February 2008
- January 2008
- November 2007
- October 2007
- September 2007
- August 2007
- July 2007
- June 2007
- May 2007
- April 2007
- March 2007
- February 2007
- November 2006
- October 2006
- September 2006
- August 2006
- July 2006
- June 2006
- May 2006
- April 2006
- March 2006
- February 2006
- January 2006
- December 2005
- November 2005
January 27th, 2010 at 4:45 pm
Nice post! The USDA also has a nice free download with exhaustive safety info and recipes for canning every kind of food imaginable.
January 30th, 2010 at 7:15 am
It’s minus 27 and the wind is making it much colder so I am only looking at our garden from my office window. I don’t plan on going out until spring. 🙂
I have been thinking about canning or making jam but we haven’t had more than we can consume during the summer. 2010 is going to be a bit different though. We are planning to more than double our garden size.
I even plan to use some big containers to gain more space for growing this year.
I am certainly excited about it.
We have a friend or two that gives us preserves and it always excites us so we are hoping that we will be able to give some of ours away and make someone else feel great.
February 4th, 2010 at 12:02 pm
I love making jam! These recipes sound delicious. I’ve never seen a banana jam before. I will definitely give it a try when raspberries are in season!
February 4th, 2010 at 4:23 pm
What a nice post to come across on a wintery day!
I’m excited about experimenting with making more jams. I’ve mostly done raspberry and raspberry-something combinations because we grow black raspberries in our garden.
These varieties sound really delicious and managable. I will give them a try! Thank you!
February 9th, 2010 at 1:48 pm
Thanks for sharing! I’m fascinated by the strawberry-kiwi jam! Just waiting for the first great strawberries to come in, here in CA, and I’ll definitely give it a try. Thanks!