
Use Compost, Save Money
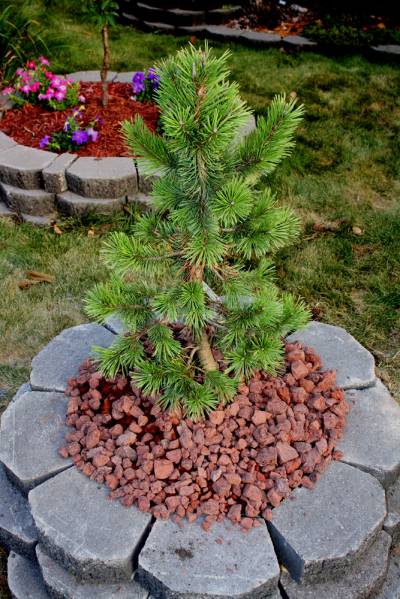
August 22nd, 2010Behold! My new Pinus Contorta “Taylor’s Sunburst”!
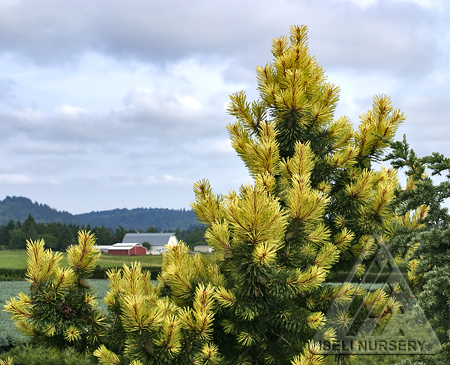
I know it doesn’t look anything special now, but this is one rare and amazing plant. In the spring the new growth lights up to a bright yellow (in contrast with the dark green older growth) in an amazing display. In Spring it will look like this:
So, did I name this post incorrectly? What does this tree have to do with compost and saving money? Well as I said, this is one rare and amazing plant. At Gee Farms, where I bought mine, a new grafted one about 6 inches tall is $50. A 4 foot one is $900. Mine, listed at 2 foot (but really two and a half+, I was told it has been potted up for sale at that size for 2 seasons), was $200.
Pretty expensive. If 4 feet is $900 then each half foot is over $100, and each inch is just under $20, lets round up and call it $20 an inch.
I make my own compost with my compost tumbler, but despite the fact that I compost just about everything I can. All garden waste, tree trimmings, all kitchen scraps that aren’t meat, etc. Despite all that, I garden so much I can’t make enough compost to fulfill all my garden needs. So I always ending buying more.
At the garden center 40 pound bags of topsoil are about $1 each, 40 pound bags of composted manure are $1.50 each. The compost however is a far far better growing medium. When you plant something you have just that one opportunity to improve the soil, you need to take it.
I’ve heard in some places when you plant a tree you should mix some native soil into the planting hole because you don’t want the tree to get “confused” or “disappointed.” I don’t buy it, for one, trees don’t think, they don’t have feelings, and in nature, all the time, will tree roots go through different types of soil. Secondly, I’ve noticed no problems planting trees in super improved soil, in fact, I’ve noticed only benefits. I think this whole theory was a result of one guy’s poor intuition that unfortunately caught on.
So anyways, you should always plant your new plants in the best soil possible, and full compost is the best soil possible. Yes, it is more expensive than top soil, but it is not expensive, it is still cheap, just not as cheap. Suppose a tree planted in composted manure grows just 1 inch per year more than a tree planted in top soil. With my new tree that 1 inch is worth $20 a year. I only needed to buy 4 bags of compost for this tree, so that is only $2 in extra cost, for $20 the first year, and that is if the compost only gives me 1 extra inch, if it gives a larger benefit the benefit is even higher.
Of course my tree is really expensive, not all trees are, but mine is also slow growing, and not all trees are. If you had a fast growing tree like a lombardy poplar you might get an extra foot or two per year by planting in really good soil.
An ounce of prevention equals a pound of cure, and a bag of compost up front can give you pounds of wood down the road. Spend the couple extra quarters up front and get bagged compost for all your planting (I also plant veggies directly in it), your plants will do better, and the increased yields and growth will far far outweigh the incremental cost of the compost.
Selling my Favorite Daylily
August 19th, 2010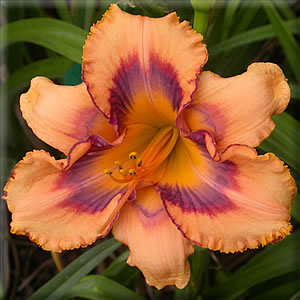
“Purple Maze” is my favorite daylily bloom, I saw it, I had to buy it, I paid a lot of money for it. I bought it when it first came available directly from the hybridizer, I think I paid $200. Kind of embarassing really, but I really like it. Apparently others do too, I’ve seen many people say it is their favorite daylily.
I recently had to move and divide it and I have 1 extra fan (the others I planted elsewhere on my property). So I’m selling it. I just listed it on ebay. So if you’re interested, head over there.
This has got to be one of my favorite reasons for growing perennials. Multiplication. Just dividing plants alone can provide you with some payback down the years, or the ability to trade, to gift, or to just expand your garden for free. Then if you do a little cutting or seed based propagation you can get even more.
I wanted to do a border of “When my Sweetheart Returns” Daylily, I bought one plant at $25. As it grew I divided it again and again, very aggressively, and now I have about 20 small clumps, which is what I needed for my border.
Pressure Pond Filter Saves the Day, Green Water Goes Away
August 16th, 2010In Spring 2008 I made a water feature in my garden. It has mostly been a huge success, I love the looks of it, I love the sound the fountains make, the fish are fun. It overall adds a certain something to the garden that I didn’t know was missing until I had it.
However I have had a bear of a time keeping the water clear. For the first couple months after I made it it stayed clear. However once the pond got established, it got dirty. I could barely get the water clear for brief periods of time. In 2009 I bought a new pump/filter set. The same kind I had originally, because the first died. It is a small pump in a box with filter pads that goes inside the pond. It doesn’t work, I don’t recommend it. The new filter/pump did some good, but most of 2009 and all of 2010 so far (once it warmed up) the water has been murky and dark. I haven’t even fed the fish in months (and they’re alive, so they must be eating the algae and whatnot).
My pea soup water, immediately after installing my new filter
The pump I had kept dying, these pumps just suck. The filter kit is like $100 bucks too, so expensive junk. I don’t want to buy a new one each year. I had resigned myself to having algae problems because I don’t want to put the time into doing all the chemicals and testing and whatnot. But I wanted the water sound, I wanted the movement, the bubbling, the fountain. It is soothing. So I knew I needed a new pump and filter, one that was easier to clean, because I figured I’d have to clean it super frequently like I did with my current one just so it could barely cope.
I settled on this external pressure filter and pump set as seen in the Amazon link here. It has a backflow valve to allow me to clean the filter without opening it, which is what mostly attracted me to it.
It also includes an internal UV filter, which should help kill algae, but when you first install the filter you’re supposed to let it run with the pump for a day before turning the UV on, to make sure there is no leaks in the electrical area.
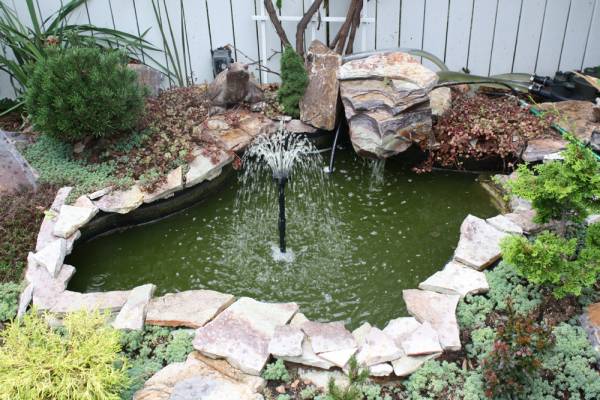
As it would turn out, the UV filter isn’t needed for me. The pond pump and filter are supposed to be able to handle a pond 5x larger than mine, and in 24 hours, BEFORE I had even turned the UV on, it had turned my green opaque swamp water crystal clear. No new chemicals added. I had even tried an 80% water swap out a few weeks ago and it didn’t help, but 24 hours with this new pump and filter and my water is crystal clear.
Sure, this setup was expensive, around $250, but I had already previously spent $200 on filters/pumps that suck. So if I had bought this from the beginning the premium I would be paying would be much smaller. Plus this pump is big enough where I can now add a waterfall, which I plan to do next year.
Installation was simple, the hardest thing was standing in Lowes and getting the multude of different sized tubings and couplings to do the connections, splits, and diverters I needed to do the hookups I wanted.
The results, 24 hours with my new pump and pressure filter
Thuja (standishii x plicata) “Green Giant”
August 14th, 2010
Green Giant Thuja’s are fast becoming one of the most popular plants for the landscape, and for good reason. They are one of the fastest growing known evergreen trees. They can grow as much as 5 feet per year or more.
The result from a supposed cross between a Japanese thuja and the US native western redcedar (not a real cedar, actually thuja plicata,) it looks strongly like the plicata and definitely different from the (at this point) more commonly planted eastern white cedar (also not a real cedar) which is thuja occidentalis most commonly seen in garden centers as Emerald Green Arborvitae.
This plant family has really confusing common names, but hopefully you can follow along.
Anyways, probably about 6 years ago I bought one, just one, and planted it. Then moved it, then moved it, then moved it. I moved it three times in three years, finally planting it on the north side of a fence where it had good soil, but little sun.
The last two years once it reached a “critical mass” of growth and started getting some sun thanks to it’s height, it started taking off. It is growing really fast now, and is getting big. In the picture, the fence is 6 feet. So my 2 foot tree ordered online, transplanted three times, and planted in shade, has grown that fast, as an evergreen.
Deciduous trees can often grow that fast or faster, I’ve seen trees put up multiple feet of new growth in a year, the cherry tree immediately to the right of the thuja is only about 3 years old, but it is getting near it’s top (and is in extremely improved soil). But such deciduous trees cannot top this thuja for attractiveness, and in the winter, it is still there.
For a hedge, or a border, there is nothing better.
In the below pictures I found when doing some reading the trees were planted in 2005 at 10 inches high only, now the biggest are over 12 feet.

When Thuja Green Giant first started being offered by nurseries and garden centers it was somewhat expensive, and many places still overcharge not realizing it. But I just bought a few weeks ago on ebay 12 of them, 3 feet high, shipped free, for $50. Around $4 a tree, really good deal.
Deer will eat them, of course, perhaps the only downside of this plant, but they will grow tall, they will grow fast, they are very attractive, and the lumber is valuable and useful. All around an excellent tree to grow. And yes, only $4 each.
Some times a tree or plant is marketed and sold by nurseries in their catalogs and it doesn’t live up to the hype. Green Giant definitely does, highly recommended.
Hail Damage on Crops and Plants
July 3rd, 2010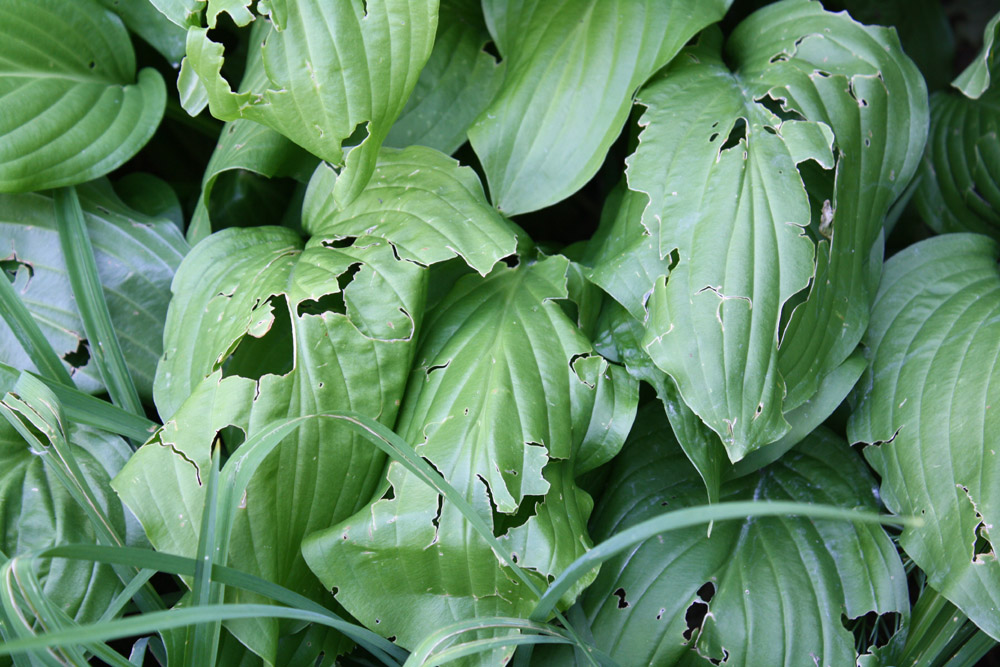
A few weeks ago we had a pretty bad storm that included some hail. I believe most people usually embellish the size of the hail they experience, I won’t do that, so let me honestly say we were dealing with blueberry sized hail. It didn’t fall for very long, but long enough to cause some misery.
Every large-leaved plant I grow got damaged. Spinach, hostas, grapes, lettuces, just to name a few.
The damage was pretty severe and in the case of my food crops, retarded their growth somewhat. It was like someone shot my garden with a shot gun, leaves had holes torn right through them, it was hail though, not bugs, because nothing was eaten, you could pick up the tatters and reform them into a perfect leaf.
As a home gardener it sucked a little bit, of course, but I cannot imagine what it’d mean for a farmer, a spinach farmer could have his entire field ruined, but I guess that is what crop insurance is for. Still, that did not always exist, in older times it had to have caused an immense hardship for communities if there was a hail storm.
In fact, I think hail is probably the worst weather disaster that can befall crops. A flood can be avoided through site selection, and floods tend to occur in Spring, leaving you fertile soil for summer planting, and a late freeze sucks, killing plants, but it is early enough in the growing season to start over. A mid summer hail though could kill or ruin everything, and it may be too late for another crop to be started. Definitely the worst of the lot if you ask me.
Gardening, Cooking, and Making Your Family Healthier
June 11th, 2010I am really into nutrition, sometimes that zeal will permeate this blog, this post is one of those times.
I’ve talked significantly in the past about growing your own food, growing healthy foods, and whatnot, and I’m not going to merely be rehashing that here, you can look in the related posts in the bottom.
Instead I want to talk more specifically about nutrition and cooking, but in a way that is only applicable to gardeners, for a reason which will become evident.
My personal relationship with food has morphed into mostly considering it as fuel. There probably isn’t a person out there who would even consider putting substandard or contaminated or the wrong sort of gasoline in their car. Afterall, they don’t want their engine to break down and car repairs can be costly.
And yet people don’t seem to give the same care to their own body, and if you think mechanics bills are high you should see doctor’s bills. The fact is our bodies are engines, and if you don’t put in the right fuel your body will break down, and that affects your quality of life.
I don’t like salmon, I will never crave salmon, I would prefer almost any protein to salmon, even other fish (except for tuna, tuna is gross). But I try to eat salmon every week, because it is very healthy for you (wild caught as much as possible though, even if frozen. Frozen wild caught > fresh(thawed) farmed). Likewise, for the past quite a few years (5 maybe) I’ve had the exact same thing for lunch almost every day. Normally people might want variety, but I see my lunch merely as fuel for my body and I treat it as such. So I have a protein smoothy with bananas and either raspberries or blueberries depending on seasonality and what I have in the house.
I don’t mean to get all preachy, but I just think that if more people thought of food as fuel, rather than a daily source of pleasure and indulgence, we wouldn’t have all the obesity problems we have as a society.
But I digress. Today I am making shredded chicken enchiladas. I cook some onions and chicken with some salsa, stock, and other seasonings for a long time until it gets all shredded then I add some reduced fat cheese, assembled the enchiladas, and bake.
However I added some ingredients you may not typically think of for enchiladas. Swiss Chard, Beet Greens, and Purslane.
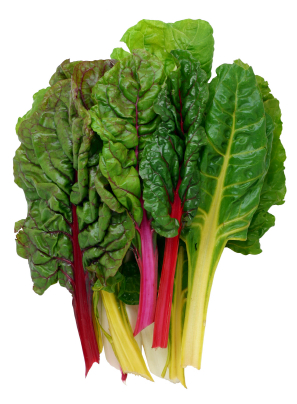
These three foods are superfoods. Swiss chard and beet greens are closely related (looking identical from the ground up) and extremely healthy. They are probably the healthiest leafy green you can eat, and they stand up well to cooking. They are also very easy to grow. If allowed to go to seed they will reseed here in Michigan. I don’t even have to plant swiss chard anymore, it just grows in my chard bed because I always end up letting a few go to seed at the end of the season. With swiss chard and beet greens you can eat both the leaves and the stalks, though I only added the leaves today, and with beets you of course get the superfood roots that have incredible nutrition benefits, beets are perhaps the single best food preventer of colon cancer. Both the roots and leaves are high in fiber as well, and tons of other nutritients.
Purslane is so easy to grow it is like a weed, in fact, it is a weed. Though I grow a cultivated variety of it that is more upright than the weed version. You can eat any version though. In addition to being high in nutrition, and like chard being able to stand up to the heat in cooking, it is the highest known plant source of Omega 3 fatty acids, including EPA type Omega 3s, which is the good kind also found in fish. Purslane also reseeds readily, plant it once and never plant it again. Of course, as a weed too, it tolerates drought, and can grow almost anywhere, needs little fertilizer, etc.
Now, here is where it gets interesting. It doesn’t always make sense to buy these plants at the store (nevermind that you can’t really buy purslane most places in the US), a whole bunch of swiss chard might be hard to eat if you’re only using it as an additive, but if you garden, you have the opportunity to grow these very very very easily to grow plants (both can go in containers too, especially purslane), and only harvest what you need when you need it.
So, during summer, I add one or both of these plants to almost everything I make. I can add them to soups, stews, stirfry, pasta sauce, casseroles, anything mixture like such as my enchilada filling tonight, and of course salads, basically anything I cook that is not grilled or a dessert. They add nutrition to meals for free, without changing taste (for those picky eaters) and most probably won’t even notice they’re in there unless you tell them. So you’re sneaking nutrition on your family. There is hardly any excuse not to do this really.
Spinach is another option for this manuever, but it isn’t quite as easy to grow (it has more pest problems, neither purslane nor chard/beets seem to be bothered by any leaf pests, at least around here), and also isn’t going to reseed for you. It also typically doesn’t get harvested all season like the other two can be. With chard/beet greens and purslane you can pick off leaves as you need them for a longer period of time and the plant will keep producing, spinach won’t do that for as long and bolts quicker.
If you can dedicate just a few square feet of your garden to these two plants you’ll have a perpetual source of sneaky goodness you can add for added nutrition to all your summer cooking. I highly recommend it.
The Right Type of Ivy to Plant Near a Wall
May 27th, 2010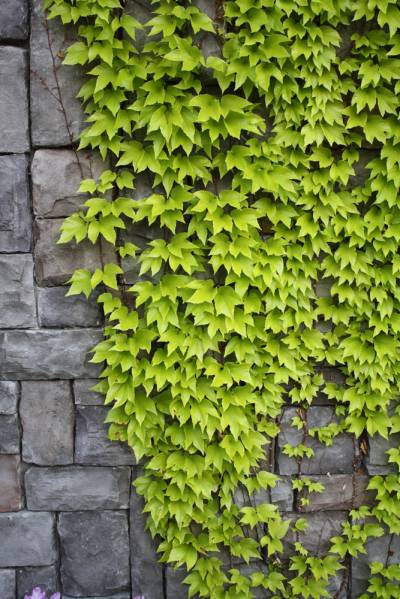
There is one mistake you really, and I mean really, don’t want to make in your landscape. You absolutely do not want to plant the wrong type of ivy for the wrong reason. Very bad things can happen.
First a word on vines…
Vines climb through a variety of methods, and it is important for you to know what they are and how they work.
1. Mechanically This is where a vine twists or turns around some support or framework naturally. Through a natural process the vine senses a nearby structure, and wraps around it. Examples of this type of vine include kiwi and clematis.
2. Tendrils Some vines grip mechanically, but through special growths called tendrils that grow out of the vines. They reach out seeking supports and then wrap around them. Examples of this type include grapes and cucumbers.
3. Suckers Some vines grip surfaces with suction cup like devices that adhere, even to flat surfaces. This category includes boston ivy.
4. Roots Some vines have roots that dig into surfaces to secure them, most ground cover vines work this way. Examples include english ivy, sweet potatoes.
So, about ivy
The two main types of ivy people grow are boston ivy and english ivy. If you allow english ivy to grow up a wall it will do so, and it will use roots, and the roots will dig into your wood, masonry, stone, or concrete, and tear it apart eventually like water expanding in a crack or a tree’s roots lifting a sidewalk. It can destroy the side of your building, a very costly mistake. English ivy is a ground cover, a great ground cover, but do not let it climb on things you want to preserve. If it you let it climb a tree it’ll also tear off the bark and kill the tree. It is evergreen though, which is why people may be drawn to it.
Boston ivy on the other hand looks great climbing up walls, my wall in the picture has a yellowish cultivar climbing up it, which I chose to be different and because it was shady I thought it would brighten up the wall to use a lighter colored plant. Because boston ivy uses suckers it doesn’t really damage what it climbs on, though it can hurt painted surfaces. Boston ivy is not evergreen, it will turn pretty colors and drop leaves in the fall, the trade off of having it not destroy your walls.
When you’re at the garden center and looking at ivy they’re not labeled as such, and many people have made the mistake of training english ivy up a wall, including yours truly many years ago, don’t make the same mistake.
Planting Sweet Potatoes
May 26th, 2010I planted my sweet potatoes the other day, and I’ve got to hand it to Burpee (where I ordered them), they said they’d arrive on the 25th, and they arrived on the 25th.
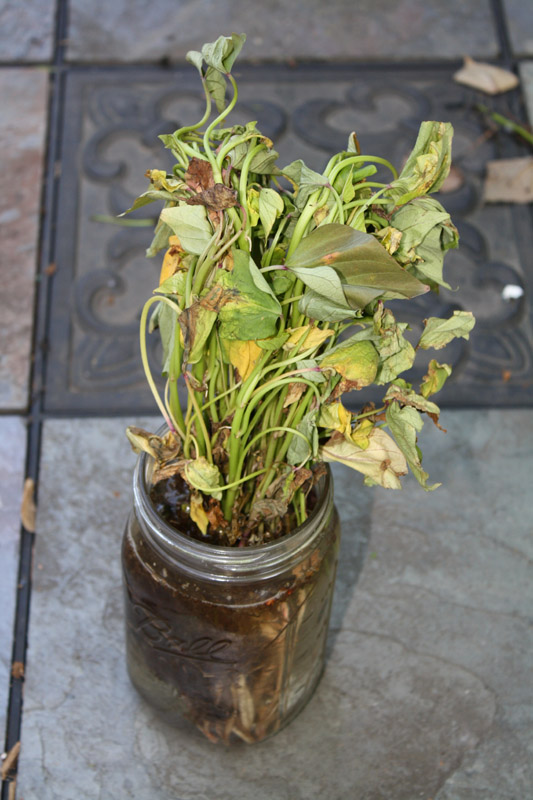
Sweet Potato Slips in a Jar
Wee Little Slips Planted in a Mound
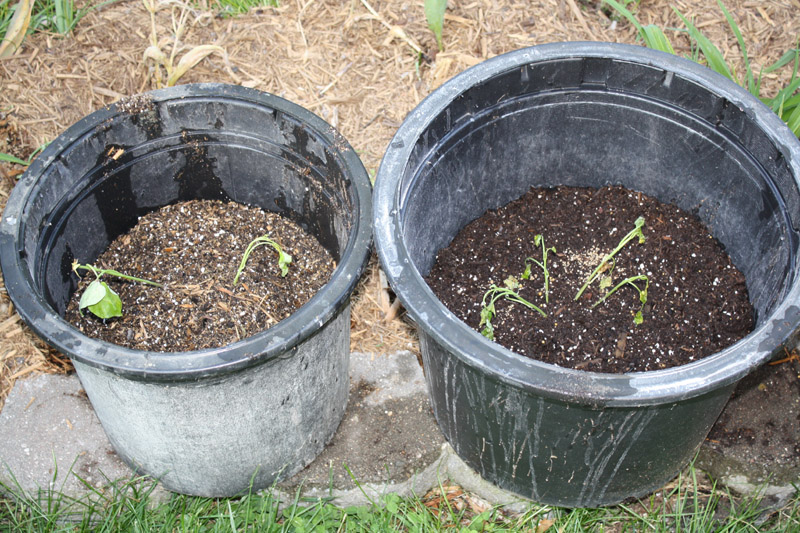
Sweet Potato Slips in Containers
If you’ve never grown sweet potatoes, you probably can, most areas of the US and even southern Canada have a long enough and warm enough growing season. There are also certain varieties that require a shorter hot growing season.
Being in Michigan I ordered one of those varieties, Georgia Jet.
Sweet potatoes are generally sold as slips. You can make your own slips, you basically stick a sweet potato in a vase of water suspended with the aid of some toothpicks. Do this 8 weeks or so before your frost safe date, they take awhile to develop, then when you’re ready you cut them off and plant them.
Or you can order slips, which I did this year (the ones I made for myself in the picture was purely for the benefit of this blog post, the lengths I go to for my readers). When the slips arrive they typically look dead, but that is normal, just put them in cool water if you can’t plant them right away (But strive to plant them right away) and try not to plant them in the glaring sun of the afternoon, but towards sunset. Water well at planting and the next few days and they should perk back up. They are very hardy plants.
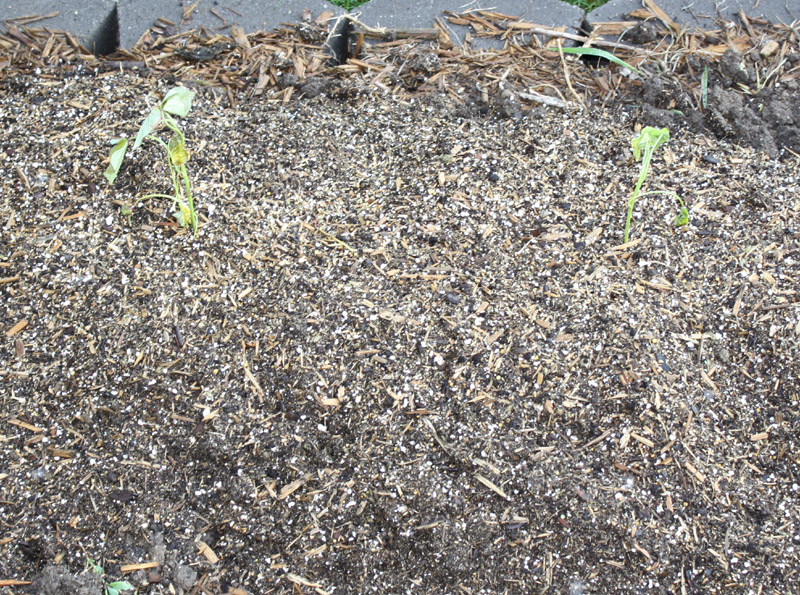
Sweet potatoes, like all root crops, prefer a loose light soil so they can grow big roots. In the bed which I planted them I turned the soil significantly with my pitch fork, and I used raised beds so it has no foot compaction, then I mounded up 10 inch high mounds of potting mix (which is as loose and as light of soil as you can find – if not cheap), and planted the potatoes in the mix. This thus creates the loosest lightest possible soil I can think of. Hopefully they do well. And of course next year, I can just reuse the same potting mix, so, it’ll be cheaper. Raised beds are also good because the soil tends to be warmer, and they need warm soil.
Sweet potatoes can also be grown in containers, if you have some big enough. I use those big black plastic containers trees come in from the nursery. If you’re big into gardening and landscaping you probably have a few hanging around. You can recycle them or throw them away but I never do because they’re so useful. For instance when digging a planting hole in an established bed they can be used to hold the soil so it doesn’t get scattered on your mulch, but that is another post. They just so happen to be very good as vegetable containers (regular potatoes too).
In an interesting bit of serendipity, not only are these containers big enough to grow sweet potatoes, but usually made of black plastic, which of course attracts the sun, gets hot, and heats up the soil, just what sweet potatoes like.
When planting sweet potatoes plants should be in hills 12-18 inches apart, with 4 feet between rows. When translating that spacing to our big containers, it basically means you plant 1 slip per container.
Sweet potatoes can be harvested any time throughout the growing season, but the longer you wait the bigger they will be. Towards the end hold on on watering lest they crack like a cabbage after a rain. Once harvested they must cure and dry a little in a fairly hot dry place, then you can store them in a cool dry place. If stored correctly they can keep months, which means your Fall harvest can last until Spring, at which point you can make your own slips from one, thus providing you with perpetual sweet potatoes.
Baby Robin Photo Diary
May 22nd, 2010I actually took these pictures in 2008, but only just now am getting around to blogging about it.
In 2008 some robins built a nest in a barberry bush just outside our kitchen window, and so I was able to monitor it daily.
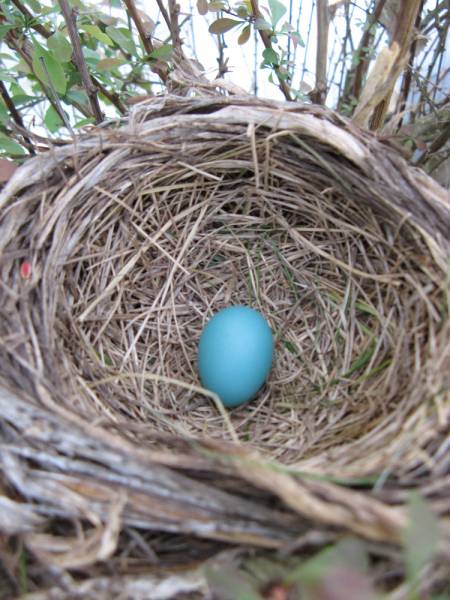
May 26th
I first noticed a single egg on May 26th. By June 1st there were 3 eggs, so apparently robins do not lay all at once, or even on the same consecutive days.
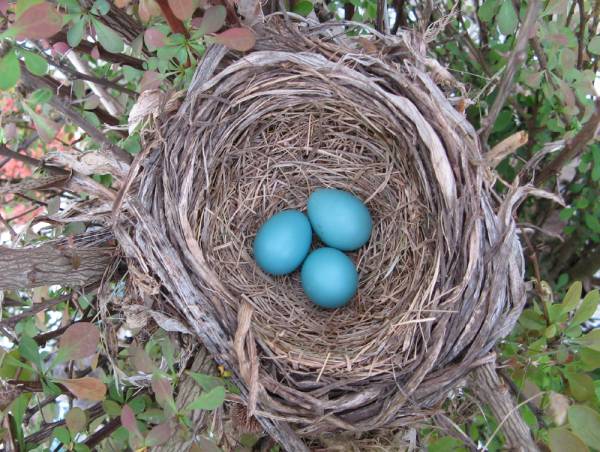
June 1st
By June 9th they had started hatching. First two, then the third.
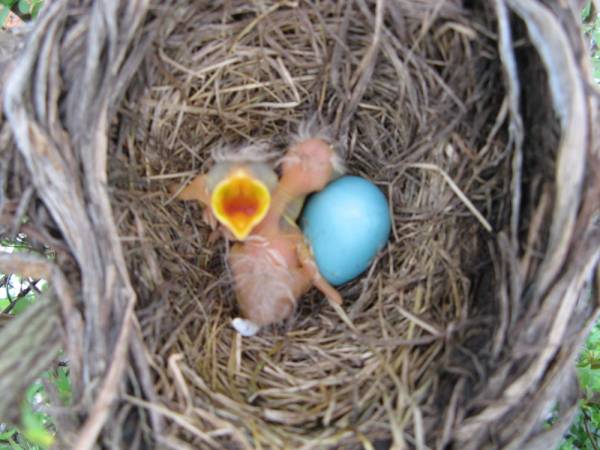
June 9th
They continued their growth and I could watch their parents feed them from our kitchen. Here they are, 5 days old.
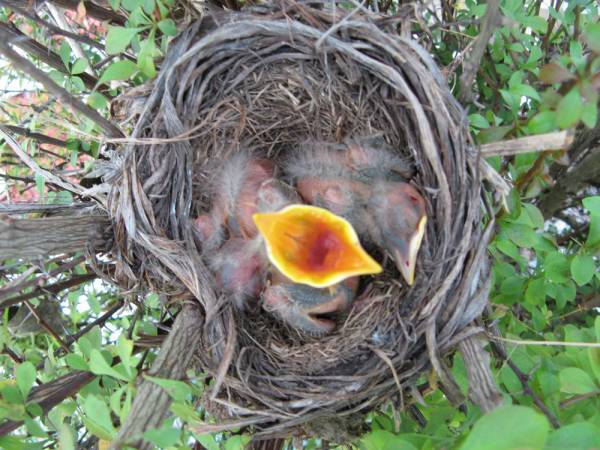
June 14th
Finally, just 2 days later, look at the growth spurt they put on, adult feathers are coming in.

June 16th
That was the last picture I had of them, the next time I looked they were gone. Apparently Robins will hop out of the nest at 10-13 days old, but they do not know how to fly yet, and I remember seeing a fledgling robin hopping around shortly thereafter. Still, they need two weeks to learn how to fly after leaving the nest, that has to be the most vulnerable time for a baby robin. Especially if you’ve got neighbors who do not understand why they should keep cats indoors.
One of the nicest things about building a nice garden if you’re also building a nice habitat for wildlife, and while we battle with the wildlife as well, seeing their life cycles is fun. Just the other day I watched a male and female red finch (which are rare around here) flirt with each other, and we’ve had cardinals build nests before, and robins. Even before this robin nest there was a fledgling robin in our yard for awhile and I helped protect it and fed it some worms and raspberries. I’ve also stumbled upon baby rabbits no bigger than the palm of your hand. I can’t wait to share that with my kids when they’re a little older.
Taxodium distichum ‘Gee Whiz’, Dwarf Bald Cypress
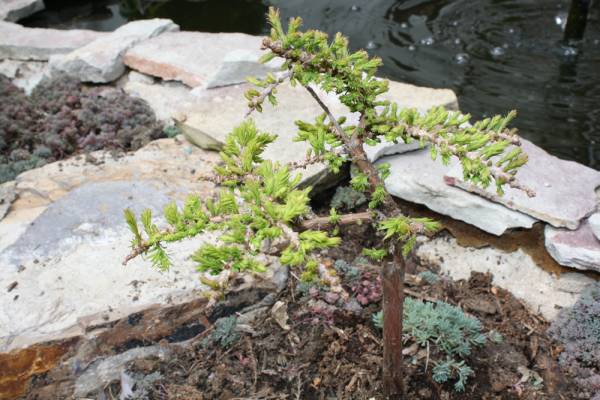
May 17th, 2010The third and final tree I bought on my weekend trip to Gee Farms was this very cute little dwarf bald cypress called ‘Gee Whiz’. It is also called a witch’s broom, as that is the type of mutation it has.
I have a thing, lately, for dwarf conifers. I have a thing for Japanese style gardens and bonsai but I can’t really do bonsai, the pots and all that, I don’t have any good spot for them. In ground bonsai, sometimes called niwaki or niwagi, I can do however, and I like doing it with little dwarf conifers.
See, normally, with bonsai, a big portion of the growth control is root pruning, with in ground plants you can’t dig them up and prune the roots all the time, so you need something else to reduce growth, and dwarf forms of plants are perfect for this.
Two years ago I built my water feature. I built it raised and in a thin area between the retaining stones and the pond I planted small dwarf conifers, sort of as a mini garden unto itself. Not all of what I planted survived though, so I used my new “Gee Whiz” to fill in one of the gaps.
Currently I’ve got a tiny dwarf barberry, a super-dwarf form of the already dwarf alberta spruce, a dwarf mugo pine in standard form, and a dwarf hinoki cypress. Pictures of them all can be found here.
This new dwarf bald cypress will fit in well, and I will be able to train and selectively prune it to form a really neat shape.
I think it’d be cool even without the water feature to build a rock garden with dramatic looking boulders and back fill it with soil and plant only dwarf plants like you’re a giant looking down on an alpine forest. I’ll probably do that one day.