
How to Grow Potatoes
Days to germination: n/a
Days to harvest: Starting around 60 days
Light requirements: Full sun
Water requirements: Consistent watering
Soil: Well-dug with added organic matter
Container: Possible
Introduction
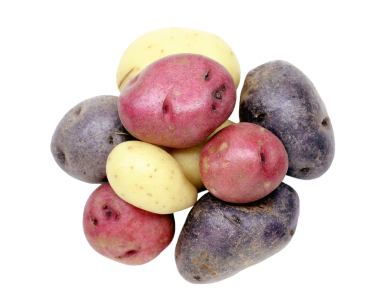
Potatoes come in all shapes and sizes, from the standard large Yukon Gold to more exotic purple potatoes. Fingerling potatoes are small and skinny, like the Russian Banana variety. There is always something a little exciting about digging up your hill of potatoes and seeing what kind of harvest is hiding under the dirt.
These starchy tubers aren’t usually treated like a vegetable when it comes to cooking, but they are a basic staple in most homes. Potatoes are always cooked, but can be eaten boiled, fried or mashed. They are high in fiber, vitamins C and B6, and low in calories.
Starting From Seed
The planting process for potatoes is fairly unique. Home gardeners don’t plant seeds, but rather seed potatoes directly into the garden. Seed potatoes are just small potatoes that have been kept from the previous year’s harvest. You can save your own over the winter, in a cool dry place or you can just buy new seed potatoes each year when it is time to plant.
Seed potatoes are usually small, and should have a few “eyes” on them. You can get a jump start on the season by letting your seed potatoes begin to sprout before planting them. Just leave them out where they can get some light for 2 weeks before your planting date.
You can extend your seed potato supply by cutting larger ones in half, as long as both pieces still have eyes on it. If you do cut your potatoes, do so a few days before planting so the fresh cuts are not exposed to the wet soil.
Potatoes are very heavy-feeders so dig your garden area thoroughly with added compost or aged manure. Dig down to loose the soil to at least a foot in depth. They will need full sun and a warm part of the garden.
You can put your seed potatoes out about 1 to 2 weeks before you are due to get the last frost of the year. The tubers should be buried about 4 inches deep, but only 12 to 16 inches apart if planted out in rows.
Though the plants can be pretty close together, the roots underneath will spread several feet. Don’t plant any other vegetables near the potatoes by at least 3 to 4 feet.
Growing Instructions
Once the plants begin to grow, about 12 inches above the soil, you should “hill up” the earth to cover them by another 4 inches. You’ll likely be covering up some healthy green leaves, and that’s fine. Potato tubers grow right under the surface, and adding extra soil after the plant starts to grow ensures that they stay underground. Any tubers that poke through will be exposed to sunlight and start to turn green, which will make them unfit to eat. As the plants grow, you can pile more soil on to increase the hill size. The stem will produce more side runners, and increase your overall harvest.
Once the plants have sprouted, take care to water regularly. Until that point, water sparingly to help prevent the seed potatoes from rotting. If you use fertilizer with your potatoes, choose one with low levels of nitrogen (or none at all). Nitrogen encourages the plant to grow, but not to produce tubers.
Another option for growing potatoes is to cover the growing plants with hay instead of dirt when you make the hills. Make sure the layer of hay is thick enough to keep out the sunlight. Your plants will make their tubers in the hay, which can make for a much easier (and cleaner) harvest later on.
When your plants start to produce flowers, you should stop hilling. You don’t want the plants to send out any more shoots at this point, so it can use its resources to build tubers.
Containers
You can grow potatoes in containers though it’s not all that practical. The container should be very large, like a barrel or even a big garbage can. It will need holes in the bottom for drainage.
Start your seed potatoes several inches below the edge of the container, to allow for hilling as the plants grow. When its time to harvest, its easiest to dig up the entire plant. Trying to harvest just a few potatoes at a time is awkward given the confines of the container.
Pests and Diseases
Unfortunately, potatoes are vulnerable to many pests and diseases that can effect your potato crop.
Scab is very common, and thankfully not destructive. You will find crusty growths on your potatoes but they are still perfectly edible. They just won’t look so appealing. Adding too much lime to your soil can cause scabbing.
Another problem that is more damaging is blight (both early blight and late blight). The leaves will start to discolour and wilt. The tubers are also effected, though you can’t see them underground. Copper-based sprays can be used against blight, but may not be much use once the disease has taken hold. Never save blighted potatoes to seed the next year.
Not surprisingly the potato beetle is a big insect pest to home garden potato crops. These striped insects will eat all the leaves off your plants if given the chance. You can pick them off by hand as they are quite visible. Pyrethrin-based insecticide sprays can help keep them off your plants as well. If you have problems with beetles, rotate your potatoes to another part of the garden to keep eggs from re-emerging the next year.
One last possible threat are wireworms. They are beetle larvae that live in the soil, and eat your growing potatoes. Their eggs are usually laid in grass, so any garden plot that has recently been converted from lawn might have a problem. There is little you can do, except plant your potatoes elsewhere next season.
Harvest and Storage
You can usually start digging up small “new” potatoes around 7 to 8 weeks after you plant the seed potatoes. Your plants can keep making potatoes for several more weeks if you are careful when you start to harvest.
It may be easier to wait until the vines start to die down, then just dig up the entire plant. If you plan on storing your potatoes for later winter use, leave them in the ground for a week or two after the vines have died. Their skins will be tougher, and they will store better.
Once they have been dug, don’t let them lay out in the sun or you will get inedible greened potatoes.
Potatoes store best in temperatures a few degrees above freezing, but fairly humid. Cool, damp basements or garages can work very well. They can keep for several months this way. Check them every few weeks though, and remove any that begin to spoil before they spread rot to the whole batch.
May 16th, 2011 at 7:16 pm
Can potatoes grow really close together. How far apart should the plants be?
July 3rd, 2011 at 7:28 pm
I think I’ll plant Russet; being the best for baking.
March 23rd, 2012 at 7:02 am
we did not harvest all of our potatoes last year do to some personal issues. do we need to dig them out this spring or will they just disolve? also can we plant potatoes in the same area of the garden each year or should we rotate to another portion of the garden. thank you, paul
July 15th, 2012 at 2:47 am
Hello All.
Just a quick question.
Will it be ok to cut the tops off my spud plants, I know it seems like a stupid question, however I just think they are too big and am asking if doing this would encourage more underneath growth without all of the nutrition going into the leaves.
Would they grow again , or would I have murdered the plant by doing so.
Cheers
Michelle
July 16th, 2012 at 12:20 pm
You got the relationship backwards, the leaves feed the roots, not just the other way around. You will have lower yields if you cut away top growth… the exception being flowers or fruits that may form on the top growth, cutting those off is a good idea.
August 11th, 2012 at 4:23 am
I planted seed pototoes very deep in a raised vege garden, then top dressed the garden thinking nothing was happening with the seeds, since they have shot out and are looking great, however have limited space to cover the leafs , I have used staw.. Do I need to cover the leafs, as the seeds are planted so deep?… never grown spuds before!!, thanks any advise would be grateful..:))
September 19th, 2012 at 7:09 pm
Tried growing potatoes in containers (ca. 36 inch high) this year and the yield was low compared to what I had hoped for/read online. I used a couple different varieties of seed potatoes and the plants grew up as I added more dirt and looked great, but the only potatoes I got were down in the very first 6-12 inches of soil; nothing above that. Had a lot of miniscule roots shooting off the main stems as the plants grew up but these didn’t send out more tubers. Any ideas on what I may have done wrong?
May 8th, 2013 at 6:04 am
I grew up on a farm back in the 50’s and 60’s. We were a family of 6 and dad had us out planting potatoes when we were 5 and 6 years old.
The only method of growing potatoes is my dad’s method. We usually had an acre of garden plus 3 potato patches that were an acre or more in size. One of his patches was almost 2 acres.
Dad would cut as small an eye out of the potato. I learned the wisdom behind this when I started growing them myself. I cut huge eyes which rotted and decreased the production. The rot from the huge eye also caused my new potatoes to rot too.
Dad planted his potatoes 18 inches apart in rows 3 to 4 feet apart You can plant them closer but you will get small potatoes.
We also started hilling the plants as soon as they got two to three inches high. Hilling is important because the plant produces the potatoes above the eye. The more dirt you hill on them the more potatoes you will have.
I have a Facebook page which in the photo section you’ll see how I hilled mine. My mistake last year was that I should have gone for rows 4 feet apart instead of three. I ran out of room to hill but most people don’t like hilling them as high as I do.
https://www.facebook.com/carl.belken
Last year we had a terrible drought. I don’t like watering my potatoes overhead but could not tell you exactly why. I just now found out on a reliable website that overhead watering causes fungal diseases to spread in potatoes.
I had last years potatoes hilled just right to where I could use the hills as an irrigation ditch. You have to be careful doing this. For example my garden slopes. If I just ran water in the trench it would pool at the end and my plants at the top got almost no water. So I took my hoe and constructed several dams in my trenches. This was a trial and error process. Eventually i started calling my dams “Water Cells” because I had as many as 6 in a 50 foot row.
I would fill my cells with water every couple of days. Last years drougth was so bad the soil soaked it right up or it would evaporate. In spite of the heat I had a really good crop.
If you decide to go with my irragation method here are some tips that will save you work.
1. When building the dam spray a little water on the dirt and tamp it down. If you don’t the dam will break when you first pour water into the trench.
2. After you hill your potatoes spray the sides lightly with water until the soil is soaked. last year I had a problem with my fresh hilled dirt sliding off into my water cells because I did not do this.
On fertilizer….
I use compost instad of chemical. I have better results with it and the beauty of compost is that it’s very hard to burn your plants by applying too much.
Last year I waited until my plants came up to put compost on them. I laid it down around close but not touching the plants. I then ran my troy Bilt tiller and ground it into the soil. Then when I finished tilling I hilled my plants. This put the compost tright where the plants needed it.
I also think potatoes taste better depending on what TYPE of ingredients you put in your compost.
I have fruit trees. One year I had a lot and I do mean a LOT of wasted fruit that went in the compost. I also took my sweet corn stalks WHILE THEY WERE STILL GREEN ran them through a chipper/ shredder and put them in my compost piles. You’d be amazed at how quickly and well green corn stalks will turn to compost and leave a good high quality compost behund.
The next year after I composted the fruit and corn stalks I used a heavy concentration on my potatoes. I had the best TASTING potatoes I had ever eaten. The next year I had no fruit and little corn. Last years potatoes were about average in taste. They were still superior to store bought.
A final note;
On the farm our best potato patch was on the site of a barn that had been torn down. That barn had housed horses,mules,cattle, and on rare occasion sheep. lots of good composted manure had turned into very rich soil over the years. I don’t ever recall dad having to fertilize that patch.
May 8th, 2013 at 6:15 am
CORRECTION;
In my previous post I stated ” The only method to grow potatoes is my dad’s method.”
WHAT I REALLY MEANT TO SAY WAS; ” The only way I know to grow potatoes is my dad’s way”
That first statement sounds arrogant and is NOT what I meant to say. I don’t know why I wrote it like that and I apologize for any confusion!!!
The corrected statement is absolutely true and it is how I have felt for many years.
June 28th, 2014 at 5:51 pm
My red potatoes have a very rough skin and has to be scrubbed off before cooking. The soul is rich but not clay nor sand.