
How to Grow Pears
Days to germination: Usually started by seedling
Days to harvest: Up to 8 years
Light requirements: Full sun
Water requirements: Regular but not excessive watering
Soil: Fertile and well-drained
Container: Dwarf varieties will grow in pots
Introduction
One of the great things about growing pears is that well cared for trees can continue to put out fruit for 100 years. That’s a pretty good return on your investment. They are fairly cold tolerant and can be grown between zones 8 and 4, though some protected areas of zone 3 can have success with pears too.
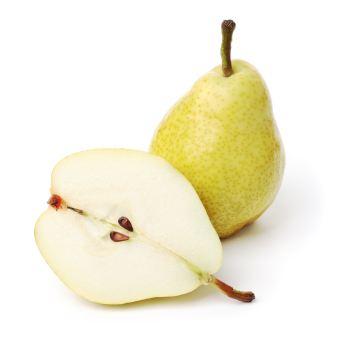
There are many pear varieties but the main groups are Bartlett, Anjou and Bosc. They’re all sweet and excellent to eat fresh once they’ve ripened, though Bosc pears are quite a bit firmer and have more of that characteristic grittiness to the fruit. Pears have a lot of fiber, potassium and even vitamin C.
Starting Your Tree
Before you go pear shopping, you should know that some varieties are self-fertile and some are not. That means you may need to plant more than one tree in order to get any fruit. If you have the space, then any variety should do. If you can only plant one tree, get a self-fertile one (like Honeysweet).
Your pear tree should be in an area with good sun but is somewhat sheltered from the wind. They like well-drained soil as long as its on the heavy side. Pears will not thrive in sandy or light soils. When you dig the hole to plant your seedling, add in a large amount of aged manure or compost to the soil. Even with the added compost, the hole should be large enough to hold the roots of the tree without having to damage them. Once planted, keep them regularly watered for the first year.
If you have more than one tree, plant them around 20 feet apart. No farther than 40 feet or they may not pollinate each other.
Tree Care
After the first year, you should think about doing some pruning. Ask for a demonstration at the nursery where you buy your seedlings as its something best learned by seeing it in action.
There are a few easy techniques you can try while you get the hang of pruning your pear trees. Don’t prune your trees too heavily as they are vulnerable to fire blight (see diseases section for more). Late summer is the best time for pear pruning.
You can cut out all dead branches, and any suckers that develop. Suckers (also called water sprouts) are green branches that usually spring up from the base of the tree or occasionally through the branches. They are very distinctive as they will grow straight up, rather than outwards like the other branches.
Also prune out any branches that are growing downwards, and trim the main central branches in the middle of the tree. By cutting the “leader”, you will limit the height growth and encourage more side branches.
Other than pruning, your pears will need the usual care. Watering during dry periods and yearly applications of standard or low-nitrogen fertilizer.
Containers
As with most other fruit trees, you can grow pears in a large container as long as you start with a dwarf variety. There are no naturally “dwarfed” pear trees, but any grafted sapling with a Quince rootstock will produce a dwarf tree.
Your container should be no smaller than 10 gallons, and larger is preferred. Use rich soil with lots of organic matter, and water regularly. Pruning will be particularly important to keep the tree a reasonable size for container growing, so plan on taking the time to keep it trimmed.
Pests and Diseases
Fire blight is a very common problem when growing pears, and you should always be on the look-out for the symptoms. It’s a fungus that can attack any part of the tree, including new twigs, leaves, flowers or fruit. The main symptoms are the turning black and shriveling of any part of the infected tree, usually at the ends of new branches. The plant will looked burned (hence the name). Infected fruit will looked water-logged and have oozing lesions.
Cut away all infected plant material as soon as its discovered and burn. You should also stay away from nitrogen-rich fertilizer as it will encourage a lot of new leafy growth that the fungus targets.
If fire blight is a problem in your area, treat your trees with a copper-based fungicide like Bordeaux spray to prevent infection. Unfortunately, it won’t actually cure an existing problem. Once it presents itself, the best thing to do is to be persistent in cutting away the diseased parts of your trees.
For insects, the codling moth can be a pear pest. The larvae will eat holes in the fruit and there can be up to 3 generations of moth through the summer. Treat your trees with insecticide right after the pear blossoms drop their petals can help get rid of the adult moths. Get rid of any dropped fruit that may contain the caterpillars so they don’t continue the cycle.
Harvest and Storage
Pears take longer than most to start producing fruit. Standard sized trees usually start fruiting at age 7 but dwarf ones will give you pears by their 5th year. Once they start to produce, they usually provide a large crop of fruit. Full-size and healthy trees can easy give you 6 or more bushels of pears each season.
Your pears will be ready to pick when they have changed from green to their lovely golden color, and the fruit comes easily off the stem with just a light twist. The pears should still be very firm. It’s a common practice to pick them slightly before full ripeness and letting them soften up off the tree.
Getting your pears to finish ripening will depend somewhat on the variety you are growing. Some will need to be kept in a cold storage environment for a few weeks before they will ripen properly. Somewhere just above freezing and well-ventilated is ideal.
Bosc and Bartlett pears don’t need this but Anjou pears do. Ask at the nursery where you buy your seedlings about the necessary steps to take to get your pears to ripen. After the storage period (if required), you will need to let them finish up with a few days at room temperature for the best flavor.
You can keep your almost-ripe pears in cold storage for months before you decide to let them ripen. Once ripe, they can’t be stored for very long before they get too soft to eat.
November 3rd, 2010 at 12:58 pm
I was wondering how cold can it get before it is damaging to the pears still on the trees, sounds like we will have a cold snap this weekend but then nice again for awhile and I sure don’t want to pick before I absolutely have to. As their are so many to lay out.
I also want to try pressing them for pear juice, Does this work and is it good?
January 9th, 2011 at 6:01 pm
Hello do you think the bosc pear tree can grow in the Bahamas island of Abaco I would like to give it a try.Am really interested I already start to grow some from seed.If you can ease give me a call @ 242-324-1993 home work 242-341-9010-12.
Anthony
best regaeds
January 10th, 2011 at 8:27 pm
I doubt it. AFAIK pears, like apples, need a cold dormant period, to be best.
Relegate yourself to growing mangoes or oranges or avocados or something. You’ll make us gardeners who can grow pears jealous.
January 19th, 2017 at 7:07 am
We live in the Panhandle of Fla. Which i say we live on a ‘sand dune’.
Pear trees do well here, but not sure about Bosch. If we dig our holes deep and large enough and fill in with good soil will this do?
January 19th, 2017 at 3:42 pm
improving the soil is always a good idea, you only have one chance to do that, at planting.