
How to Grow Kale
Days to germination: 5 to 8 days
Days to harvest: 50 to 60 days
Light requirements: Full sun or some shade
Water requirements: Frequent watering
Soil: Fertile is best, but not necessary
Container: Yes, but not ornamental
Introduction
Kale is the perfect plant for any beginner gardener. It grows well in nearly any kind of soil, has few problems associated with it and will give you a quick tasty harvest.
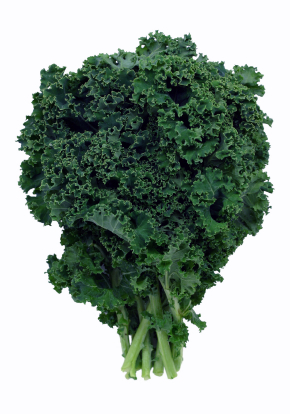
It comes in a wide range of textures and colors. Several shades of green, to deep pink, red or even white. The leaves are usually crinkly but there are smoother-leafed varieties and some that are very tightly ruffled. Some kale varieties are strictly ornamental and have bitter leaves.
Kale is one of the most nutritious plants you can grow in the garden, and is packed with vitamins. You will get nearly an entire day’s worth of vitamin C in a serving, and more than a day’s supply of vitamins K and A. Add in manganese, calcium, potassium and fiber and you have yourself a plant worth eating.
Starting from Seed
You can already start kale very early when starting by seed outdoors, but you can get a bit of a head-start by seeding indoors and planting transplants instead.
Get your seeds started under half an inch of soil, around 8 or 9 weeks before your expected date of last frost. Make sure they get lots of sun so they don’t get spindly or “leggy”. That’s one of the reasons you only keep your transplants indoors for a few weeks.
Transplanting
Your seedlings (or seeds) can go out into the garden 6 weeks before your last frost date, or about 3 weeks after you started them. Dig up the soil and add compost or aged manure to prepare the area.
Space your seedlings to 20 to 24 inches apart so that your growing plants aren’t crowded. If the plants have gotten long in the stem while indoors, plant them so that part of their lower stem is underground. You can do this right up to the lowest set of leaves to help your plant develop a more sturdy shape.
Seeds should be planted out 2 or 3 at a time, spaced out the same as the seedlings. Once they sprout, clip away the weaker seedlings and leave only the strongest plant. Keep the soil constantly moist for the best germination.
About 2 months before your first frost, you can put in another batch of seeds for a fall crop of kale. Make sure they are well-watered when the weather is hot.
Growing Instructions
Water your kale frequently and avoid dry spells. The plants can tolerate a bit of drought, but the leaves will quickly get bitter if it happens. A standard fertilizer mix is a good idea once or twice during the summer.
You can start picking the leaves well before the plant matures (see the harvest section for more).
Containers
Kale grows very well in containers, and its attractive foliage makes a nice edible addition to a flower garden. As mentioned above, there are some forms of kale intended to only be used for their looks and are not edible. Don’t purchase seeds for flowering kale or ornamental kale. Once you mention “container kale” at the garden store, they might point you in the wrong direction.
That doesn’t mean you have to avoid all bright varieties. Osaka Pink or Red Hybrids are gorgeous and still tasty.
If you plan on picking leaves frequently, you can probably grow 2 plants in a deep 12″ across pot. Put out seeds the same time as in the garden, though you can probably get away with a week earlier since the soil will warm up faster in a container. The soil should be well-drained and fertilized.
Pests and Diseases
Kale is usually a very maintenance-free kind of plant, but keep an eye out for a few potential problems. Rotate your crops every season so that none of these pests can accumulate in the soil each year.
A light dusty white coating is likely powdery mildew, a very common problem will all kinds of leafy vegetables. It can kill your plant if you don’t treat it quickly. A standard spray fungicide should get rid of it, and you can help prevent it by not getting excessive water on the leaves. When you water your plants, pour the water on the soil rather than over the entire plant.
Cabbage moths can lay eggs in the spring, that hatch into hungry root maggots that will devour the plant’s roots. A row cover of mesh can keep the moths away, but once the maggots are in the soil, there isn’t much you can do.
One more fungus that can be a problem is black rot. The leaves will start to wilt and yellow in a “V” shaped patch. As it gets worse, there will be a build-up of thick yellow liquid inside the leaves and stalk. You can’t treat it, other than pulling up the plant and possibly harvesting your other plants before it starts to spread.
Harvest and Storage
Kale is usually harvested all through the growing season, so you can start picking off a few leaves once they reach 3 to 4 inches long (much sooner than the actual maturity date). Larger leaves can still be used but are better for cooking than eating raw.
Never pick all the leaves, or the ones right in the center or you will kill the plant. Only harvest the outer leaves. Twist off gently, or snip with garden scissors.
Depending on how often and how many leaves you harvest as the plant is growing, you can roughly estimate a pound of kale for every plant.
As the weather gets hotter and the plants reach their full maturity, your kale leaves will lose their appetizing flavor and so the entire head should be harvested. They won’t actually go to seed unless you let the plants overwinter until the next spring.
If you are growing a later fall crop, you can keep picking leaved until after the frost hits. A few light frosts will actually make the leaves sweeter and definitely won’t kill the plant. When you are expecting a real hard freeze, cut the entire heads for your final harvest. For areas where the winters are mild, you might be able to harvest kale leaves all through the winter until spring.
You can store your kale leaves in the fridge for several days, or you can freeze the fresh (uncooked) leaves for longer-term storage. Once frozen, you can really only use your kale in cooking. The leaves won’t retain their fresh texture for salads or raw eating.
February 12th, 2012 at 3:06 pm
helpful article 🙂
March 23rd, 2012 at 10:52 am
Thank you! Very informative.
April 16th, 2012 at 6:40 am
Thank you. It was useful.
June 14th, 2012 at 4:07 pm
Believe it or not, I am 71 years old, live in the south, grew up with gardens, and have NEVER eaten
kale. This was very informative, so in the fall
I will plant some kale when I get room in my garden. Thanks a lot.
August 12th, 2012 at 6:22 pm
I just bought a beautiful redbor kale plant at the store, and I want to put it in a larger container for our sun porch. It is fully enclosed and gets morning sun. I would like to keep the kale plant there this winter. We live in the Pacific Northwest. Is it possible to keep it alive and be able to harvest leaves from it all winter?
May 31st, 2014 at 5:01 pm
Should kale be fertilized, and if so, with what? Thank you.
January 22nd, 2017 at 5:03 pm
Excellent article. I am from J&K State {India) presently staying in the USA. Kale is not a common veg in Kashmir and people do not know about it in full. Now a few years back some one introduced it as an ornimantal plant.I am going to Kashmir soon, if allowed I can take one or two packs of Kale seeds to grow in my back yard for personal use. I will follow the directions given in the beautifully written article. I think the Kashmir is an idea place for kale to grow and eat for many many health benefits. thanks a lot.