
Frugal Gardening: Starting Perennials from Seed
December 14th, 2014I think everyone loves a nice mass planting. Mixed plantings look nice too, but it is hard to beat the statement of a mass planting. A whole bed of lilies, a whole bed of hostas, a whole bed of daylilies, or cone flowers, or rudbeckias, or phlox, or whatever. Maybe not all the same exactly hybrid, but all the same species.
But man, sometimes, gardening can be expensive. Even if you were buying them for $1 each (unlikely) or $5 each (more likely) you’re looking at spending hundreds of dollars to pull it off.
However, if you have patience and a little equipment (or a nice south facing window) you can get those plants for a lot less.
Hybrids
Most perennials you buy are hybrids, which means they are a specific plant that has been cloned to be reproduced. So every Stella de’oro daylily looks like every other one, they have the same genetic code. When you introduce sexual reproduction (with bees & seeds) you get different plants. So if you saved a bunch of seeds from Stella de’oro many would look the same, but many would also look different. So the first thing you need to remember when saving perennial seeds is that they will not grow the same as their parents. That is okay though, with hostas a bunch of different leaf shapes, sizes, and colors are desirable in a mass planting, and so long as you aren’t a collector most flowers like lilies or daylilies are the same.
Selecting & Prepping Seeds
Different seeds have different requirements for germination. Generally you should wait to harvest the seeds until the plant is ready to give them up. That means the seedpod is brown and starting to crack open on its own. Harvest and sort the seeds, separating them from the pod and any other plant remnants. Generally you may need to dry them out a little more, so don’t store them in an airtight container, a brown bag is fine or an open jar.
Now you’ll have a little bit of research to do. Some plants need what is called stratification, or a cold and or wet period, to germinate. They get this naturally by sitting on wet ground during winter, but you will need to mimic this indoors. So if you’re growing a seed that requires this (like daylilies) you can put them in an old butter container or something in some water in the fridge for 6-8 weeks. At the end of this time often you’ll see the seed outer coat start to split open, and that means it is time to plant.
With other plants that do not need stratification, such as hostas, you can skip that step.
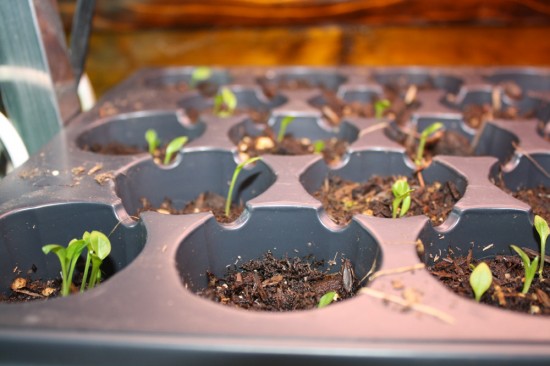
Regardless if you needed cold storage or not, the next step is heat, plants tend to germinate in the Spring when the soil warms up, and it is that warming of the soil that does it. So get a plastic seed starting tray, I like ones with 72 cells, and you’ll need a lid for it. Plant your seeds and again you’ll need to do some research as to planting depth, but generally a quarter to a half an inch is appropriate for most perennials. Then water with warm water and put the lid on. You can also spring for a seedling heat mat to put under the tray if you want, or otherwise keep it somewhere warm like near a radiator.
You also need to do a little research and see if the plant you are trying to grow needs light to germinate, in which case you really hardly plant the seed it all, but put it on top of the dirt and just sprinkle a little potting mix on top. If the seed does require light to germinate you should put it in a south facing window, or if not you should put it beneath a grow light setup. And that is the one cost you’ll incur that isn’t so cheap if you don’t have a south facing window (I don’t currently, blech). With your grow lights you need to place it as close to the plants as possible, and then raise it up as the plants grow. Remember that, people usually don’t and just stick it something like a foot above the plants which is too far (until the plants are 10 inches tall anyways).
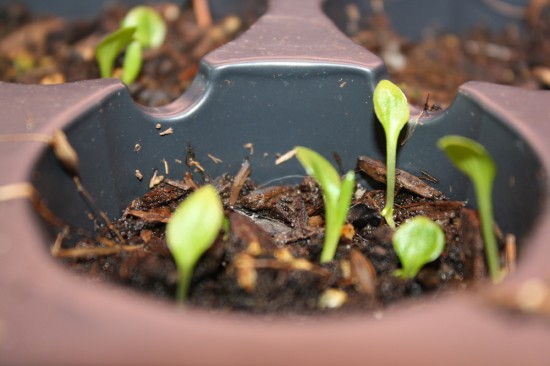
Somewhere between one and three weeks your seed should germinate, and I really recommend planting 3 or 4 seeds per cell because not every seed will germinate and you can always cull the excess ones.
After Germination
The best time to start this process is in winter, so after germination it is likely too cold to plant outside still. So you’ll need to put them in that south facing window and or under your grow light. Take the lid off the tray now as you can let the humidity escape the soil since germination is over, however you will now need to water the tray regularly (and gently).
I also highly recommend putting a fan near the plants to provide them with wind, an oscillating fan is best but any fan will do. Plants grown in still air develop weak spindly stems and do not do well when finally placed outdoors.
If you’re growing under lights continue to adjust the lights upward as the plant grows taller and wait for the weather to warm up.
The Fruits of Your Labor
Once the weather warms up to a safe level you can bring the plants outdoors, however they’re unlikely to be ready for it. You need to harden them up by putting them outside during the day, and taking them in at night, for as long as 2 weeks, also starting them in the shade and only gradually introducing them to full sunlight. Even if they were in a window before. Plants grown indoors usually can’t take 8 hours of full sun at first after being indoors all their lives.
Once they’re fully adapted to the outdoors you can plant them in a permanent spot, but now you must wait. Perennials grown from seed take a long time to develop. If you cut a division off a daylily to make a new plant you’ll get a flower than year or the following year. A daylily grown from seed may flower in year 2 if you’re lucky, but perhaps not until year 3. Other plants like hostas are the same. If you save seeds from a big beautiful hosta with massive leaves, the seeds are going to be different from the parent but still likely will be a large leaved hosta – but it will take 5, 6, 7 years for the hosta to mature to be that size.
So you need patience, but on the other hand, this is a cheap and easy way to get a ton of plants.
I’m moving next summer and in my new place I’ve going to have exponentially more garden room than I do currently, but I’m loathe to think of all the work and spending it will take to plant all those spaces. So I’m preparing now. My current project is seed starting hostas, and the pictures in this post are from that. They won’t be named hybrids, but they’ll eventually be nice big hostas and will look good in a mass planting I’m hoping to have on the shaded side of the house. I’ve previously done this with daylilies though by now I have so many daylilies I can take divisions from I don’t feel a need to use their seeds (also I find hostas harder to divide by divisions than daylilies).
You can of course also do this with annuals, not just perennials, however annuals are so much more expensive in the end (having to be grown from seed every year, not just once) I don’t really think they belong in a post about frugality. Perennials are always the frugal choice.
Perennial seeds aren’t something you can usually buy at the garden center or grocery store like annual seeds. If you can’t save your own from your plants in your existing garden, try a gardening friend or ebay. Lots of people sell perennial seeds from their garden on ebay.

December 18th, 2014 at 3:21 pm
Thanks for the informative article. I plan to start some perennials, as well as several other plants, from seed this coming year and I’ve noted several of your pointers. As you mentioned, the cost of buying the plants can be pretty extreme for most gardeners. This past summer I began growing cuttings for the first time and had very good success with that, so I hope propagating my own plants through seed will work out well also.
January 1st, 2015 at 6:58 pm
Great Article.
I am a total beginner when it comes to gardening but I decided to give it a shot and go with the seeds instead of buying the plant.
Of course, it’ll be a lot more trouble to get these seeds to germinate but I feel like it would be much more rewarding once the plant fully matures 🙂
Sam
January 2nd, 2015 at 7:10 am
Very informative, thanks. I’ve never started perennials from seed before but think about it every year. Maybe this will give me the motivation I need to do it.
February 1st, 2015 at 8:44 am
I’ve never heard of seed starting hostas because they are so easy to divide into new plants. Good for you for having the patients to pull it off, and I know what you mean about needing to fill all those new spaces. Whew!
March 24th, 2015 at 6:13 am
Excellent article with just the right amount of information to get us motivated and off to a successful spring crop of home-grown perennials. Would you suggest keeping these plants in pots for a year to gain more root & foliage growth so that they transplant more successfully?