
How to Grow Chervil
Days to germination: 10 days
Days to harvest: 40 days
Light requirements: Some shading is preferred
Water requirements: Frequent watering
Soil: Well-drained but will take to any soil
Container: Adapts well, even indoors
Introduction
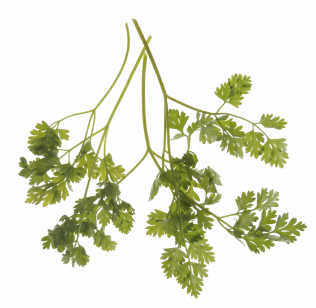
Chervil is a lesser-known herb for home gardens, but it is a very versatile herb that can be used in a number of dishes. The plant is very leafy and looks a bit like a fern. It’s closely related to parsley, with a faint anise or licorice taste to the leaves. Chervil is the main ingredient in the well-known blend of French herbs called “fines herbes”.
There is a variety of chervil grown for its roots, sometimes referred to as turnip-rooted chervil. It’s not that common but shouldn’t be confused with the chervil grown as an herb for its leaves. You can also find that chervil is called by other names, such as French parsley or Gourmet parsley.
The plant is an annual, so you will have to start new seeds each year. It can get to a height of 2 feet though it seldom grows that tall with regular harvesting of the leaves.
Considering that its only used in small quantities for flavor, chervil doesn’t really impact the nutrient content of your food. It does have calcium, manganese and vitamin C though. It goes very well with fish, chicken, eggs and potato soup. You can also eat the leaves fresh in a salad.
Starting from Seed
Because chervil grows with a long taproot, it doesn’t transplant very well. You’re better sowing your seeds directly into the garden. Chervil seeds don’t last very long though. After about a year, you’ll find a sizable reduction in germination. So don’t bother with old seed.
Plant chervil in a lightly shaded area that won’t get the full sun during summer months. Don’t bury the seeds, but rather just sprinkle them on the surface of the soil and keep moist until they start to sprout. Once they start to grow, thin down to one plant every 10 inches or so.
They do prefer cooler weather so plant your seeds early in spring, about 3 weeks before your last frost date. Or for a crop later in the season, plant additional seeds after the hottest weather of summer is passed (at least a month before your first frost date).
Or rather than 2 set crops, you can also sow additional seed every few weeks for a more staggered harvest of chervil.
Growing Instructions
Keep it well-watered particularly the heat of summer. If the plants get too hot, they are likely to bolt to seed. Once that happens, you’ll find the leaves have lost their taste and will quickly become bitter. Keeping the leaves well-trimmed can also help prevent early bolting.
Though they love water, don’t douse the plant at watering time. Overly wet leaves can promote fungus growth (see Pests section).
If you want to have an ongoing crop of chervil each year, let 1 or 2 plants develop their flowers and go to seed. They will easily repopulate your chervil patch each season without any effort from you.
Containers
Chervil can be grown in a pot as long as it is deep enough to accommodate the long roots. Containers should be 8 to 10 inches across and at least 12 inches deep for each chervil plant.
While most herbs do better in very sunny windows when grown indoors, chervil will do better in more indirect light. Outdoor pots can be kept on shaded patios or decks.
Water potted chervil often, though indoor plants are not as bothered by overheating as outdoor plants, meaning they can be watered a little less than plants in the garden.
If you cut the flowers out before them bloom, you can keep your chervil growing all through the winter. It won’t last forever though, and will eventually die since it is just an annual. Plant a few extra seeds in the fall so you have fresh chervil during the winter months too.
Pests and Diseases
Chervil is a very pest-free herb to grow and is seldom bothered by any insect, fungus or disease problems.
Aphids do like chervil but they are easy to wash off with a little water. If you want to spray with insecticide, use one intended for vegetables or fruit. Ladybugs are a natural predator of aphids and can be a natural way to control aphids all through your garden. Some garden centers sell live ones that you can buy.
You can also have an occasional problem with slugs, especially with younger plants. Keep a saucer of beer nearby to attract (and drown) them, or sprinkle the soil around your chervil with a little diatomaceous earth. It’s a natural product that will kill soft bodies pests like slugs or caterpillars without harming any animals.
If you continually water your plants from above and wet the leaves, you may get powdery mildew on your chervil. Use a watering can with a spout, and pour the water underneath at the soil. Powdery mildew looks like white dust on your plant, and it can usually be treated with a fungicide.
Harvest and Storage
You can pick chervil leaves as you need them, usually starting around 6 weeks after you first plant your seeds in the spring. Summer-planted chervil will grow faster, and you can start harvesting in about 3 to 4 weeks. For the best flavor, pick the outside leaves.
It is somewhat tolerant of frost but once the cold weather settles in, you should pick as much chervil as you can before it dies back.
Chervil is used in a number of cooked dishes but it will lose its flavor very quickly when heated. If you are going to use your fresh chervil, add it at the last minute to your food.
Freshly-picked chervil can be kept in the refrigerator for about a week before losing its flavor. For longer storage, you can either dry or freeze your chervil. Drying does have a tendency to lessen the flavor as well, so most people freeze their chervil for use through the winter. Chop the leaves up, and freeze into chunks with a little water in an ice cube tray.
Even freezing isn’t ideal. Chervil is really best fresh from the plant. Growing a small pot of it indoors over the winter is a better option than trying to store your summer crop of herbs.
One Response to “How to Grow Chervil”
Leave a Response
Blog Categories
- Critters & Creatures (20)
- Gardening (222)
- Edible Gardening (60)
- Plant Profiles (32)
- Planting Ideas (40)
- Troubleshooting (48)
- Gardening Coupons & Deals (13)
- Greenhouse Gardening (4)
- Landscape Design (22)
- Pictures (8)
- Reviews (2)
- Videos (5)
Recent Forum Posts 
| Thread Title | Replies |
| hi | 0 |
| savetiktok | 1 |
| Hello all | 0 |
| Онлай... | 0 |
| Hello all | 0 |
| Introduction | 1 |
| Thuja Green Giant | 0 |
| write my philosophy paper for me | 0 |
| I am looking for some advice. | 4 |
| Fruit that's really nice, but not c... | 0 |
|
Members: 3189 | Posts: 3761 Come Join the Discussion Today! |
|
Site Categories
Archives
- December 2020
- December 2019
- November 2019
- January 2019
- April 2018
- February 2018
- December 2017
- November 2017
- May 2017
- April 2017
- September 2016
- July 2016
- June 2016
- April 2016
- March 2016
- February 2016
- December 2015
- November 2015
- September 2015
- June 2015
- May 2015
- April 2015
- January 2015
- December 2014
- November 2014
- October 2014
- September 2014
- July 2014
- June 2014
- March 2014
- February 2014
- December 2013
- November 2013
- September 2013
- July 2013
- June 2013
- May 2013
- April 2013
- January 2013
- December 2012
- November 2012
- October 2012
- August 2012
- July 2012
- June 2012
- April 2012
- March 2012
- February 2012
- October 2011
- September 2011
- August 2011
- July 2011
- June 2011
- May 2011
- April 2011
- January 2011
- December 2010
- October 2010
- September 2010
- August 2010
- July 2010
- June 2010
- May 2010
- April 2010
- March 2010
- February 2010
- January 2010
- December 2009
- October 2009
- July 2009
- June 2009
- May 2009
- April 2009
- March 2009
- January 2009
- December 2008
- November 2008
- October 2008
- September 2008
- August 2008
- July 2008
- June 2008
- May 2008
- April 2008
- February 2008
- January 2008
- November 2007
- October 2007
- September 2007
- August 2007
- July 2007
- June 2007
- May 2007
- April 2007
- March 2007
- February 2007
- November 2006
- October 2006
- September 2006
- August 2006
- July 2006
- June 2006
- May 2006
- April 2006
- March 2006
- February 2006
- January 2006
- December 2005
- November 2005
June 29th, 2015 at 8:16 am
Just a big fat THANK YOU! You are kind to take the trouble to share your expertise with us uninformed newbies! I especially appreciate the “skip the pot because of the long taproots” information. Who knew?
Now I know where to find what I need to keep my little herb garden happy.
Thanks so much.