
How to Build an Island Bed with Retaining Wall Bricks
March 4th, 2012Island bed? What is that? No, it isn’t a bed with palm trees. An island bed is a bed not connected to anything, such as your foundation or property line. It exists as an island, alone in a sea of grass. This blog post will be about how to make a raised one with retaining wall bricks. Why build it up as a raised bed? Well, in additional to looking better, giving you the opportunity to improve the soil, and improving drainage. You also have to bust up less sod, which is my least favorite gardening task, and I’m sure your’s as well.
Step 1: Draw your shape
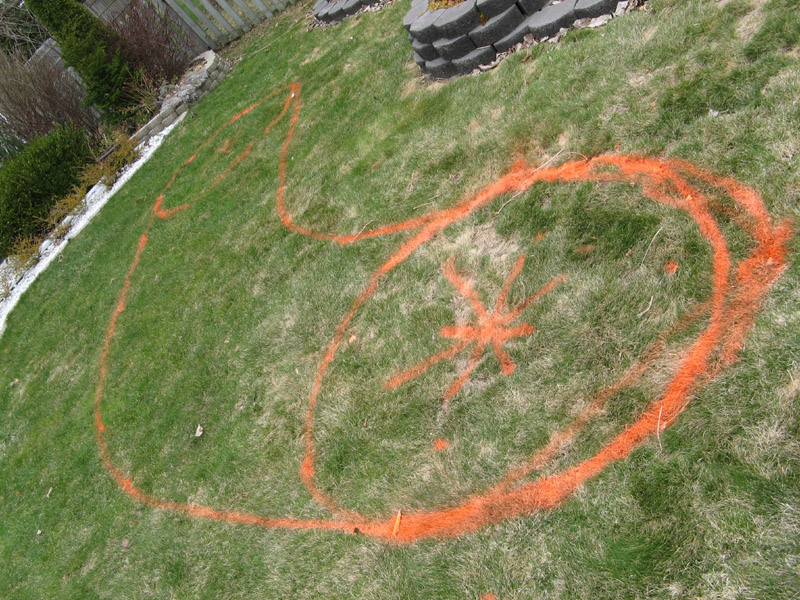
The first thing you need to do is draw an outline for your raised bed. I recommend large sweeping curves, organic shapes. If you want a perfect circle you can do that as well, I recommend cutting a board to the diameter of your circle and using that as a guide. You can use a hose or string or rope to create your shape, but spray paint works best.
Step 2: Put down a liner

The next thing will be to gather some plain brown corrugated cardboard or a bunch of black and white newspapers and place it in the middle of your new bed on the grass. This material, which is completely safe for the garden, will act as a temporary weed/grass barrier until it decomposes in about 90 days. You don’t want to use a permanent barrier that will block future roots, you just want something that’ll last long enough to block the grass and whatnot.
Step 3: Dig trenches
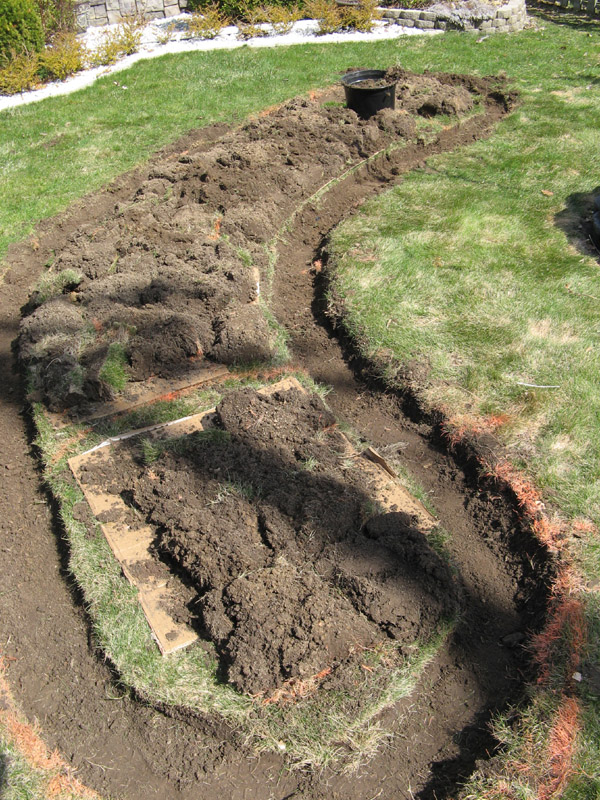
The only bit of sod busting you must do is an approximate 10 inch wide trench along the inside border of your new raised bed. I recommend a flat shovel for this as the bottom needs to be flat and fairly level. If you have a sod cutter/edger you can use it to perforate the area into blocks making it easier to pick up the sod. As you dig, flip the chunks sod side down on top of your cardboard. When done, pile bags of composted cow manure (or whatever type of soil you plan on using) inside the bed. I recommend manure because you only get one chance to improve the soil like this.
Step 4: Lay your first bricks
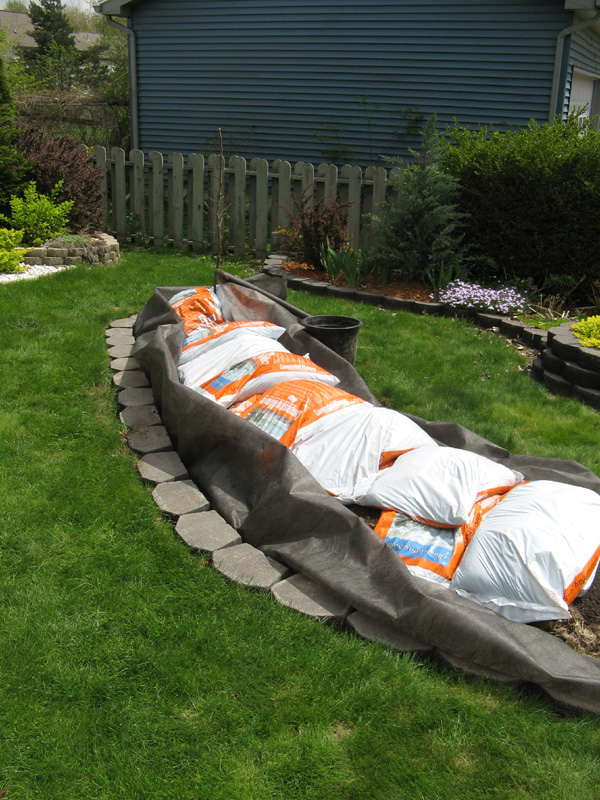
The first thing you need to do here is unroll some high quality weed landscape fabric in your trench with the excess going towards the inside of the bed. This will line your future bricks on the inside to prevent soil from draining out. Then you can lay your first brick in the trench, level it with dirt if needed, and move along with the second brick. This first row will take the longest.
Step 5: Finishing Laying Bricks and Fill
Once you get the first row of bricks done, put down a bead of landscape block adhesive and lay the second row (you may need to cut bricks with a chisel or saw to fill in the last one on a row). When you reach your desired height, slash open the bags of dirt inside with a knife and empty them in place. You will probably need to tamp down at the edges.
Step 6: Staple the Fabric
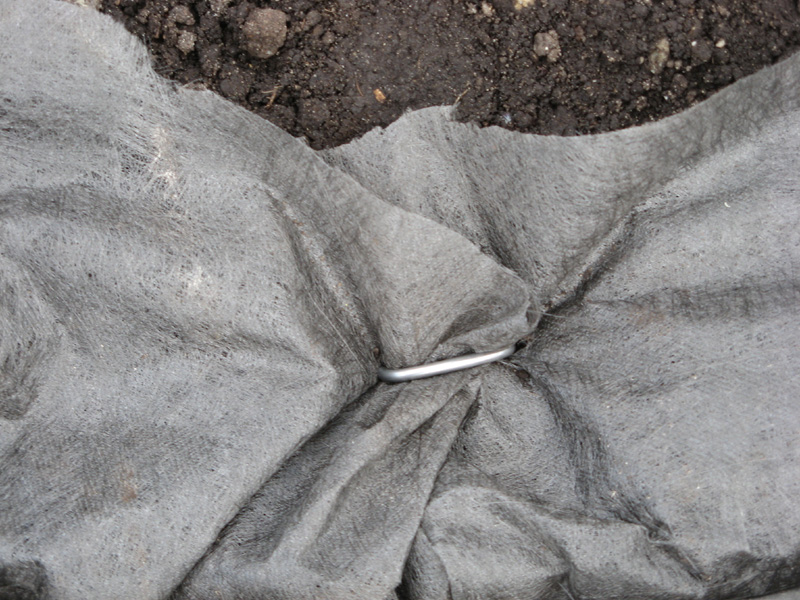
Fold your landscape fabric in towards the center of the bed, trim off any excess beyond a 6 inch swath around the edges of your bricks. Then secure it to the soil using landscape fabric staples. Your soil is now secure and shouldn’t run out between the cracks in the bricks (too badly anyways).
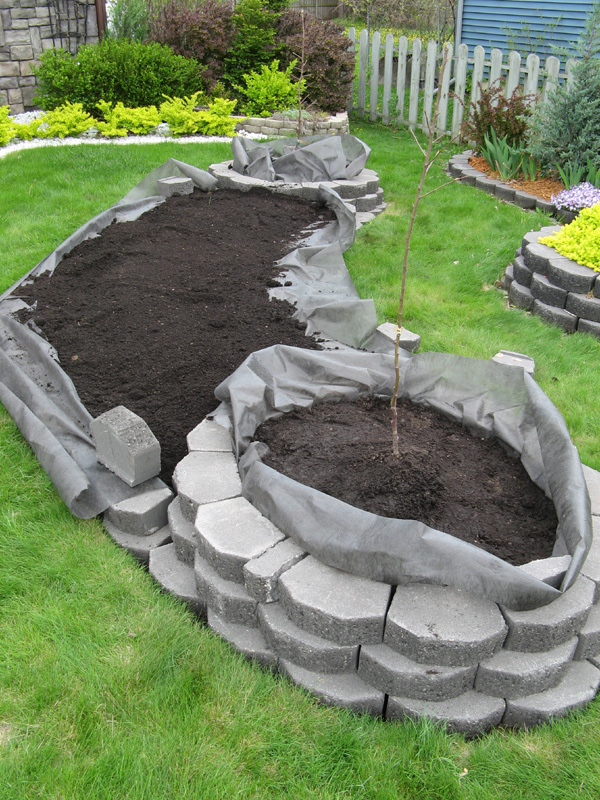
Step 7: Mulch, Plant, and Enjoy
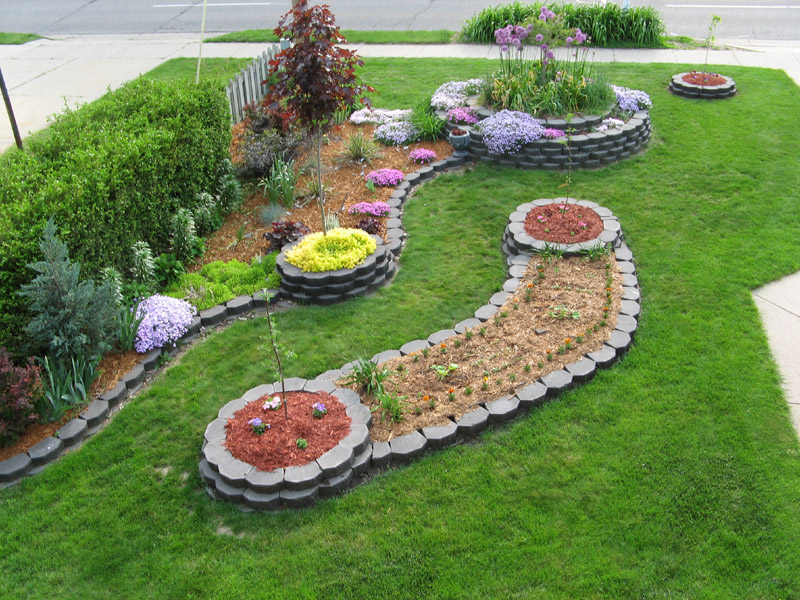
Finally you just need to mulch and plant your new raised retaining wall brick bed. You can do different designs and multiple tiers using the same principles outlined above, you’ll see I did two tiers with the example for this blog post. If there are gaps between the front of your bricks and the lawn you can fill it with any leftover soil, or leave them be and they’ll fill in eventually by themselves. You should expect some settling over time on the bed contents as the grass way underneath rots, so feel free to really mound up that mulch.
You may find this video and this article helpful with completing this project.

13 Responses to “How to Build an Island Bed with Retaining Wall Bricks”
Leave a Response
Blog Categories
- Critters & Creatures (20)
- Gardening (222)
- Edible Gardening (60)
- Plant Profiles (32)
- Planting Ideas (40)
- Troubleshooting (48)
- Gardening Coupons & Deals (13)
- Greenhouse Gardening (4)
- Landscape Design (22)
- Pictures (8)
- Reviews (2)
- Videos (5)
Recent Forum Posts 
| Thread Title | Replies |
| hi | 0 |
| savetiktok | 1 |
| Hello all | 0 |
| Онлай... | 0 |
| Hello all | 0 |
| Introduction | 1 |
| Thuja Green Giant | 0 |
| write my philosophy paper for me | 0 |
| I am looking for some advice. | 4 |
| Fruit that's really nice, but not c... | 0 |
|
Members: 3189 | Posts: 3761 Come Join the Discussion Today! |
|
Site Categories
Archives
- December 2020
- December 2019
- November 2019
- January 2019
- April 2018
- February 2018
- December 2017
- November 2017
- May 2017
- April 2017
- September 2016
- July 2016
- June 2016
- April 2016
- March 2016
- February 2016
- December 2015
- November 2015
- September 2015
- June 2015
- May 2015
- April 2015
- January 2015
- December 2014
- November 2014
- October 2014
- September 2014
- July 2014
- June 2014
- March 2014
- February 2014
- December 2013
- November 2013
- September 2013
- July 2013
- June 2013
- May 2013
- April 2013
- January 2013
- December 2012
- November 2012
- October 2012
- August 2012
- July 2012
- June 2012
- April 2012
- March 2012
- February 2012
- October 2011
- September 2011
- August 2011
- July 2011
- June 2011
- May 2011
- April 2011
- January 2011
- December 2010
- October 2010
- September 2010
- August 2010
- July 2010
- June 2010
- May 2010
- April 2010
- March 2010
- February 2010
- January 2010
- December 2009
- October 2009
- July 2009
- June 2009
- May 2009
- April 2009
- March 2009
- January 2009
- December 2008
- November 2008
- October 2008
- September 2008
- August 2008
- July 2008
- June 2008
- May 2008
- April 2008
- February 2008
- January 2008
- November 2007
- October 2007
- September 2007
- August 2007
- July 2007
- June 2007
- May 2007
- April 2007
- March 2007
- February 2007
- November 2006
- October 2006
- September 2006
- August 2006
- July 2006
- June 2006
- May 2006
- April 2006
- March 2006
- February 2006
- January 2006
- December 2005
- November 2005
March 4th, 2012 at 10:49 pm
Very informative! We have some stuff like this in our yard that was already built when we started renting the house. I dream of building more beds…but I don’t know if it will happen since we are just renting. Thanks for all of the helpful tips too. I have read almost every post you have written 🙂
March 26th, 2012 at 9:35 am
That looks very beautiful 🙂 I did something like that but with rocks.
May 3rd, 2012 at 10:46 am
This is beautiful!
So, you don’t remove the grass under it before proceeding? You just let it die under the cardboard?
May 9th, 2012 at 7:40 am
Wow! I like that!
July 6th, 2012 at 6:25 am
Love it! Perfect for the small yards we see here in Key West. And the paver choices available today make it easy to be very creative.
July 15th, 2012 at 7:10 pm
All I can say is “awwww…” You made it seem so easy so I am more motivated to try your idea out.
The final result of your effort was amazing. I would definitely have this blog bookmarked for when my yard is ready for a major renovation to make way for my garden. All the steps that you mentioned are simple, clear, and easy to understand. Thanks!
August 16th, 2012 at 7:35 am
How timely that I just found your blog today and this post in particular! I’m in the planning stages of a very large new flower bed and this is exactly the type of information I need. Thanks!
August 16th, 2012 at 1:04 pm
Wow, that is really cool! My parents have wanted some landscaping done for a while and I volunteered to help them come up with ideas. I really want to incorporate a stream, too. This is a nice start! Thanks!
August 24th, 2012 at 1:46 am
This is Awesome! And how wonderful that you did this island bed with retaining brick walls using those 7 easy simple steps to follow? I really like how the finished product looks.
October 4th, 2012 at 2:44 pm
Wow, that last picture is not what I expected to see! I was thinking on doing something like this in my back yard since the garden just wraps around the property line and looks a bit boring. This is such a great idea. With my husbands help it doesn’t seem to be to hard either! I would just be the one to spray paint over and over again because I keep changing my mind of the shape! Thanks for sharing!
April 13th, 2013 at 8:06 am
When beginning to build your garden bed, I found it useful to use a weed whacker to rid the surface of grass/weeds the future garden bed.This also allows you to visualize what the shape of your bed will be!!!
May 1st, 2017 at 6:52 am
This is absolutely gorgeous !! Your block is very informative and well explained.
June 9th, 2018 at 4:50 am
Very impressed with your information you passed along,as well as what sounded to me was some trial and error experience. Thank you for the tips, I feel I can actually make one of these.